【Kotlin/Android Studio】AlertDialogの使い方!カスタマイズ方法

この記事からわかること
- Android Studio/KotlinのAlertDialogの使い方
- アプリでダイアログ(ポップアップビュー)を実装する方法
- リストやチェックボックス、ラジオボタンなど
index
[open]
\ アプリをリリースしました /


環境
- Android Studio:Flamingo
- Kotlin:1.8.20
AlertDialogでダイアログを実装する方法
Androidでダイアログ(ポップアップビュー)を実装するにはAlertDialogクラスを使用します。実装方法は簡単で「MainActivity.kt」にコードを書くだけで実装することが可能です。今回はボタンをタップされた時にダイアログが出る仕組みを実装していきます。まずはその前に「activity_main.xml」にボタンを設置しておきます。
<androidx.constraintlayout.widget.ConstraintLayout xmlns:android="http://schemas.android.com/apk/res/android"
xmlns:app="http://schemas.android.com/apk/res-auto"
xmlns:tools="http://schemas.android.com/tools"
android:layout_width="match_parent"
android:layout_height="match_parent"
tools:context=".MainActivity">
<Button
android:id="@+id/done_button"
android:layout_width="wrap_content"
android:layout_height="wrap_content"
android:text="Done"
app:layout_constraintBottom_toBottomOf="parent"
app:layout_constraintEnd_toEndOf="parent"
app:layout_constraintStart_toStartOf="parent"
app:layout_constraintTop_toTopOf="parent" />
</androidx.constraintlayout.widget.ConstraintLayout>
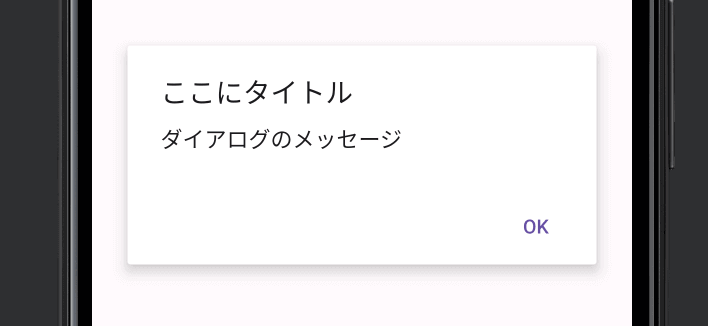
シンプルなダイアログ
まずはシンプルなダイアログを実装して使い方をみていきます。AlertDialogクラスからBuilderを呼び出し、引数にはContext(ここではthis)を渡します。そこからsetTitleメソッドでタイトルをsetMessageメソッドでメッセージをsetPositiveButtonメソッドでボタンを定義します。最後にshowメソッドを実行することでダイアログが表示されます。
val button:Button = findViewById(R.id.done_button)

button.setOnClickListener {
    AlertDialog.Builder(this)
            .setTitle("ここにタイトル")
            .setMessage("ダイアログのメッセージ")
            .setPositiveButton("OK", { dialog, id ->
                // ボタンクリック時の処理
            })
            .show()
}
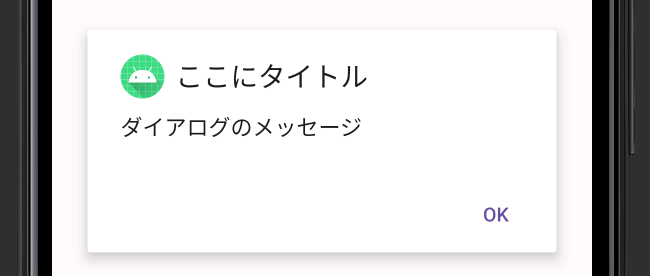
アイコンをつける
setIconメソッドを使用することでダイアログに画像(アイコン)を設置することができます。
val button:Button = findViewById(R.id.done_button)

button.setOnClickListener {
    AlertDialog.Builder(this)
            .setTitle("ここにタイトル")
            .setMessage("ダイアログのメッセージ")
            .setPositiveButton("OK", { dialog, id ->
                // ボタンクリック時の処理
            })
            .setIcon(R.mipmap.ic_launcher)
            .show()
}
ボタンを2つ表示する
ボタンを2つ表示するにはsetPositiveButtonメソッドとsetNegativeButtonメソッドを使用します。setPositiveButtonメソッドで指定した方が右側にsetNegativeButtonメソッドが左側に来るように配置されます。
AlertDialog.Builder(this)
    .setTitle("ここにタイトル")
    .setMessage("ダイアログのメッセージ")
    .setPositiveButton("OK", { dialog, id ->
        // ボタンクリック時の処理
    })
    .setNegativeButton("キャンセル", { dialog, id ->
    // ボタンクリック時の処理
    })
    .show()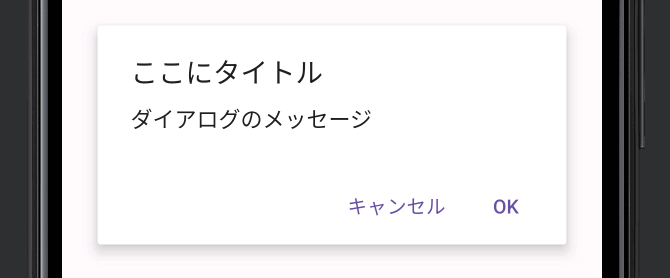
3つ目のボタンを表示する
setNeutralButtonメソッドを使用することで3つ目のボタンを設置することができます。これはダイアログの左側に配置されます。3つ目と書きましたが、ボタンの定義が1つしかない状態でsetNeutralButtonメソッドを使用しても変わらずダイアログの左側に配置されます。
AlertDialog.Builder(this)
    .setTitle("ここにタイトル")
    .setMessage("ダイアログのメッセージ")
    .setPositiveButton("OK", { dialog, id ->
        // ボタンクリック時の処理
    })
    .setNegativeButton("キャンセル", { dialog, id ->
        // ボタンクリック時の処理
    })
    .setNeutralButton("その他", { dialog, id ->
        // ボタンクリック時の処理
    })
    .show()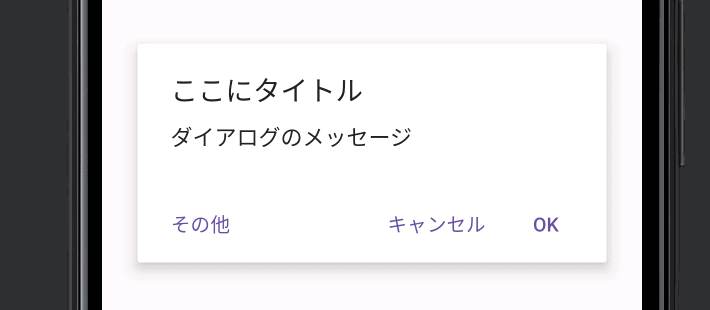
ダイアログでリストを表示する
ダイアログ内でリストを表示するにはsetItemsメソッドを使用します。引数に表示させたいリストを渡します。
val list = arrayOf("kotlin","Swift","Dart")
AlertDialog.Builder(this)
    .setTitle("アプリ開発言語")
    .setItems(list, { dialog, id ->
        // ボタンクリック時の処理
    })
    .setPositiveButton("OK", { dialog, id ->
        // ボタンクリック時の処理
    })
    .show()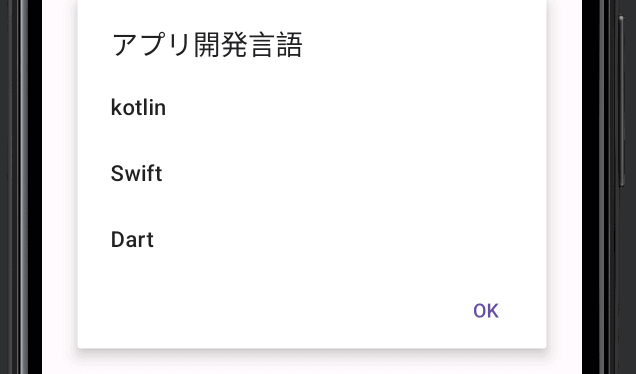
ダイアログでチェックボックスを表示する
ダイアログ内でチェックボックスを表示するにはsetMultiChoiceItemsメソッドを使用します。引数に表示させたいリストとチェックフラグを渡します。
val list = arrayOf("kotlin","Swift","Dart")
val checkedFlags = booleanArrayOf(true, false, false)
AlertDialog.Builder(this)
    .setTitle("アプリ開発言語")
    .setMultiChoiceItems(list, checkedFlags, { dialog, id, isChecked ->
        // ボタンクリック時の処理
    })
    .setPositiveButton("OK", { dialog, id ->
        // ボタンクリック時の処理
    })
    .show()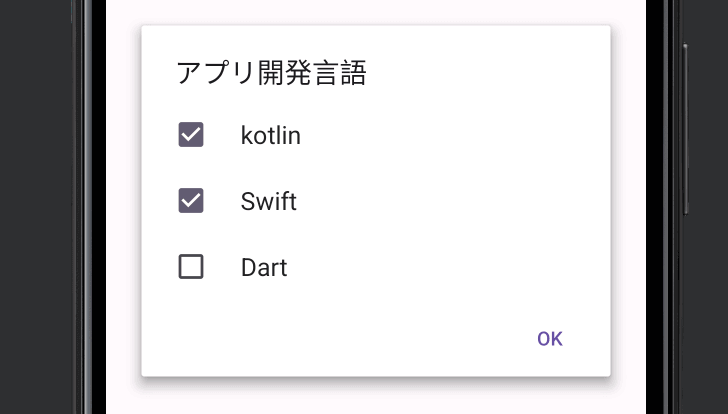
ダイアログでラジオボタンを表示する
ダイアログ内でラジオボタンを表示するにはsetMultiChoiceItemsメソッドを使用します。引数に表示させたいリストとデフォルトでチェック状態にするインデックス番号を渡します。
val list = arrayOf("kotlin","Swift","Dart")
AlertDialog.Builder(this)
    .setTitle("アプリ開発言語")
    .setSingleChoiceItems(list, 0, { dialog, which:Int ->
        // アイテム選択時の処理
    })
    .setPositiveButton("OK", { dialog, id ->
        // ボタンクリック時の処理
    })
    .show()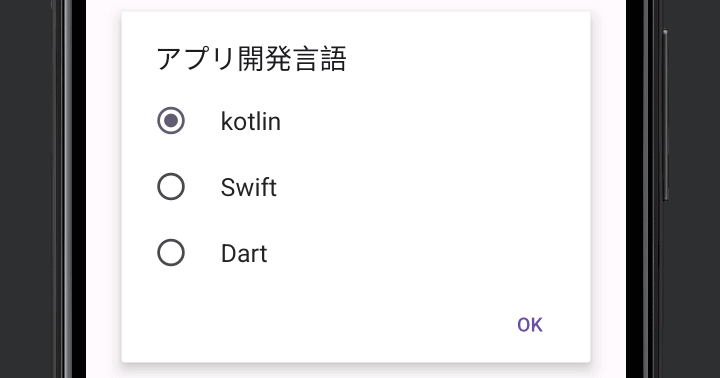
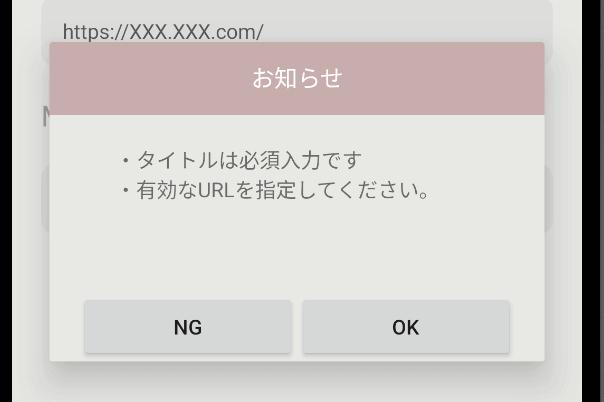
独自レイアウトダイアログ
以下のような独自レイアウトのダイアログを実装したい場合はDialogFragmentを使用して実装する必要があります。実装方法は以下の記事を参考にしてください。
まだまだ勉強中ですので間違っている点や至らぬ点がありましたら教えていただけると助かります。
ご覧いただきありがとうございました。