【Android Studio】ConstraintLayoutの使い方!制約によるレスポンシブ配置方法
この記事からわかること
- Android StudioのConstraintLayoutとは?
- WidgetsとLayoutsとは?
- ビューを制約的に配置する方法
- app:layout_constraintXXXXX属性の種類
- 辺を揃えるには?
- ベースラインを揃えるには?
index
[open]
\ アプリをリリースしました /


参考文献:公式リファレンス:ConstraintLayout
環境
- Android Studio:Flamingo
- Kotlin:1.8.20
ConstraintLayoutとは?
AndroidのConstraintLayoutとはビューに制約を設けて配置するLayoutsの1種です。AndroidではButtonやTextViewなどのビュー要素を「Widgets」と呼びます。そしてそのWidgetsを配置するためにConstraintLayoutなどの「Layouts」があります。またWidgetsはLayoutsの中にしか配置することはできません。Androidのレイアウトファイルでは必ずルートにLayoutsのいずれかを指定する必要があります。
ConstraintLayoutは「コンストレイントレイアウト」と読み、翻訳すると「制約的なレイアウト」といった意味になります。ここでいう制約的とはビューに対して条件を課すことで配置するような意味になります。
制約的に配置する
ConstraintLayoutを使用してWidgetsを制約的に配置してみます。最初から用意されている「activity_main.xml」既にルートがConstraintLayoutになっているので、そこにButtonを3つそのまま追加してみます。
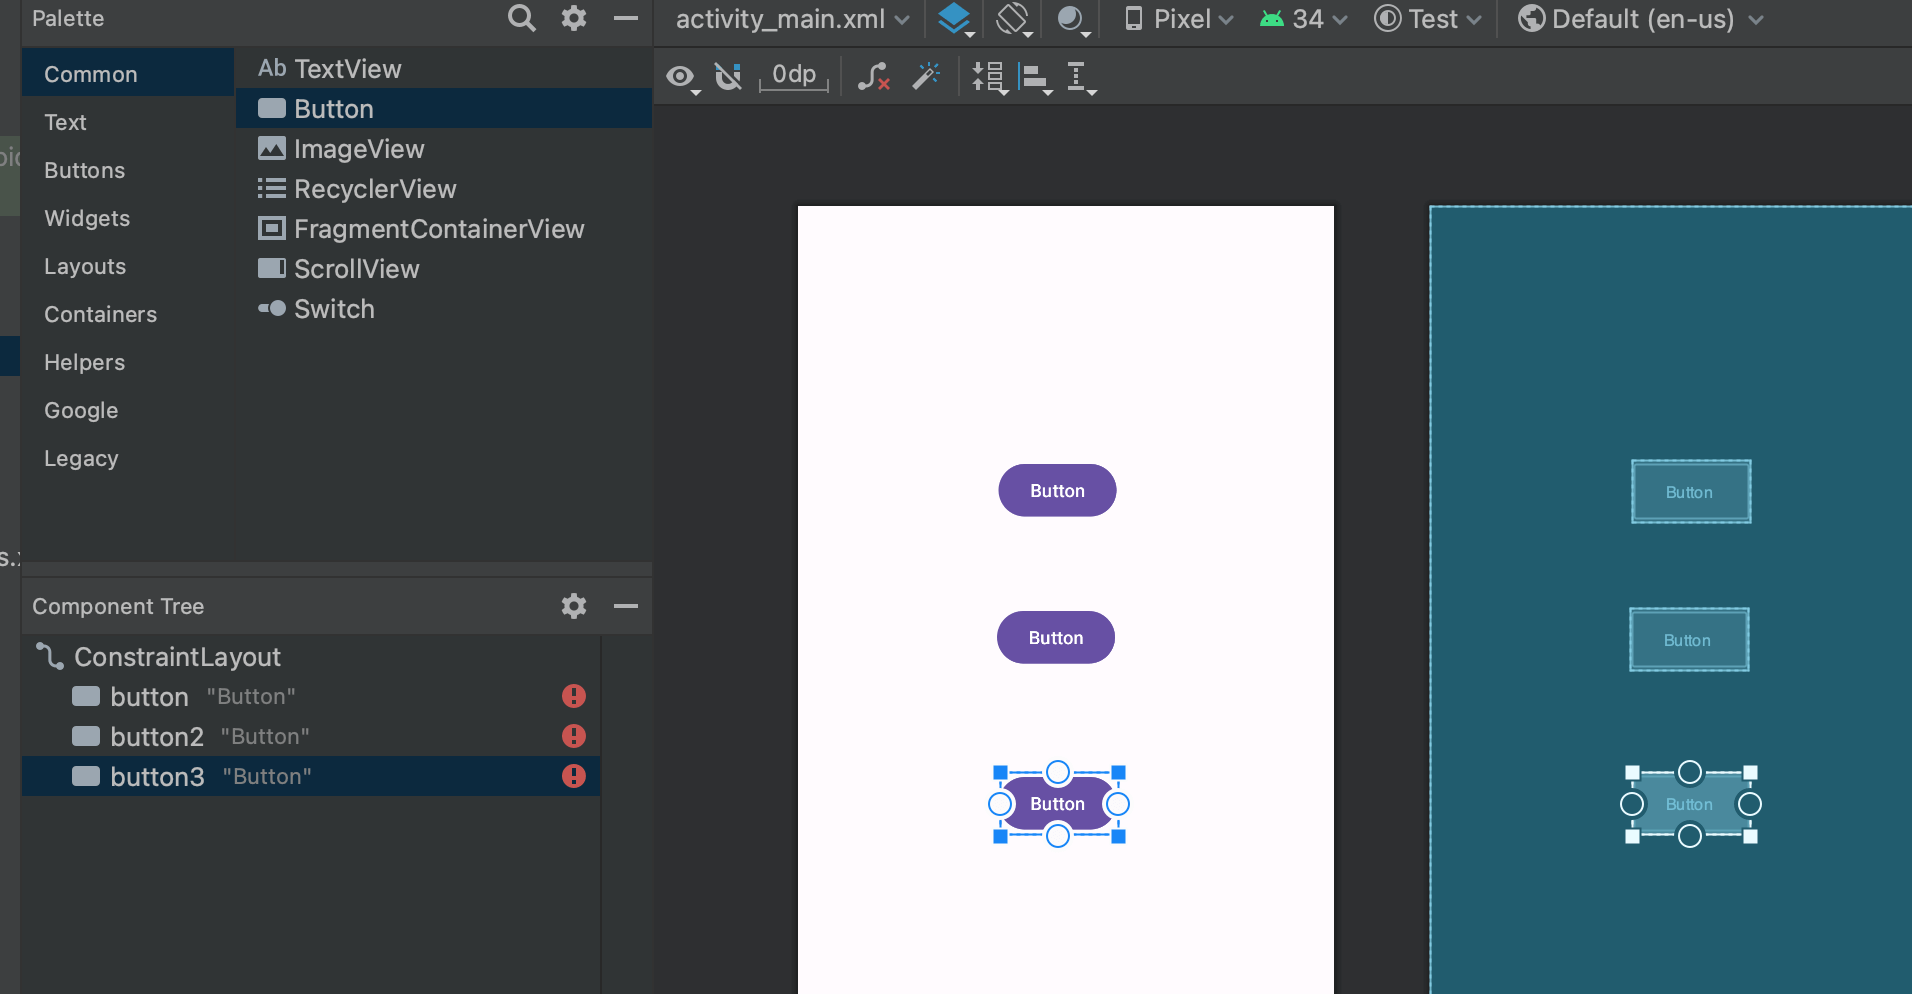
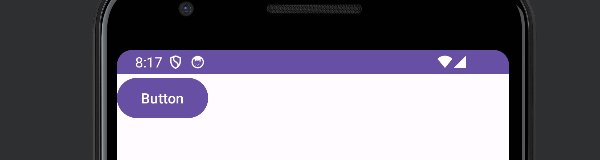
左側の「Component Tree」を見てみると というエラーが発生していることがわかります。これはビューに対して制約が付与されていないことを示すエラーであり、コンパイルエラーにはなりませんがこのままビルドしても制約がないためデザイン画面とは異なり全て左上に配置されてしまいます。制約は垂直、水平方向ともに少なくとも1つは必要です。
制約を付与するにはコードで記述するかデザイン画面からビューの上下左右にある 部分をドラッグ&ドロップすることで付与できます。例えばButtonを1つ画面の中心に配置し、残り2つはそのButtonの画面の端(上下)の真ん中に配置されるようにしてみます。

<androidx.constraintlayout.widget.ConstraintLayout xmlns:android="http://schemas.android.com/apk/res/android"
    xmlns:app="http://schemas.android.com/apk/res-auto"
    xmlns:tools="http://schemas.android.com/tools"
    android:layout_width="match_parent"
    android:layout_height="match_parent"
    tools:context=".MainActivity">

    <Button
        android:id="@+id/button"
        android:layout_width="wrap_content"
        android:layout_height="wrap_content"
        android:text="Button"
        app:layout_constraintBottom_toTopOf="@+id/button2"
        app:layout_constraintEnd_toEndOf="parent"
        app:layout_constraintStart_toStartOf="parent"
        app:layout_constraintTop_toTopOf="parent" />

    <Button
        android:id="@+id/button2"
        android:layout_width="wrap_content"
        android:layout_height="wrap_content"
        android:text="Button"
        app:layout_constraintBottom_toBottomOf="parent"
        app:layout_constraintEnd_toEndOf="parent"
        app:layout_constraintStart_toStartOf="parent"
        app:layout_constraintTop_toTopOf="parent" />

    <Button
        android:id="@+id/button3"
        android:layout_width="wrap_content"
        android:layout_height="wrap_content"
        android:text="Button"
        app:layout_constraintBottom_toBottomOf="parent"
        app:layout_constraintEnd_toEndOf="parent"
        app:layout_constraintStart_toStartOf="parent"
        app:layout_constraintTop_toBottomOf="@+id/button2" />
</androidx.constraintlayout.widget.ConstraintLayout>
相対的に配置する(マージンの付与)
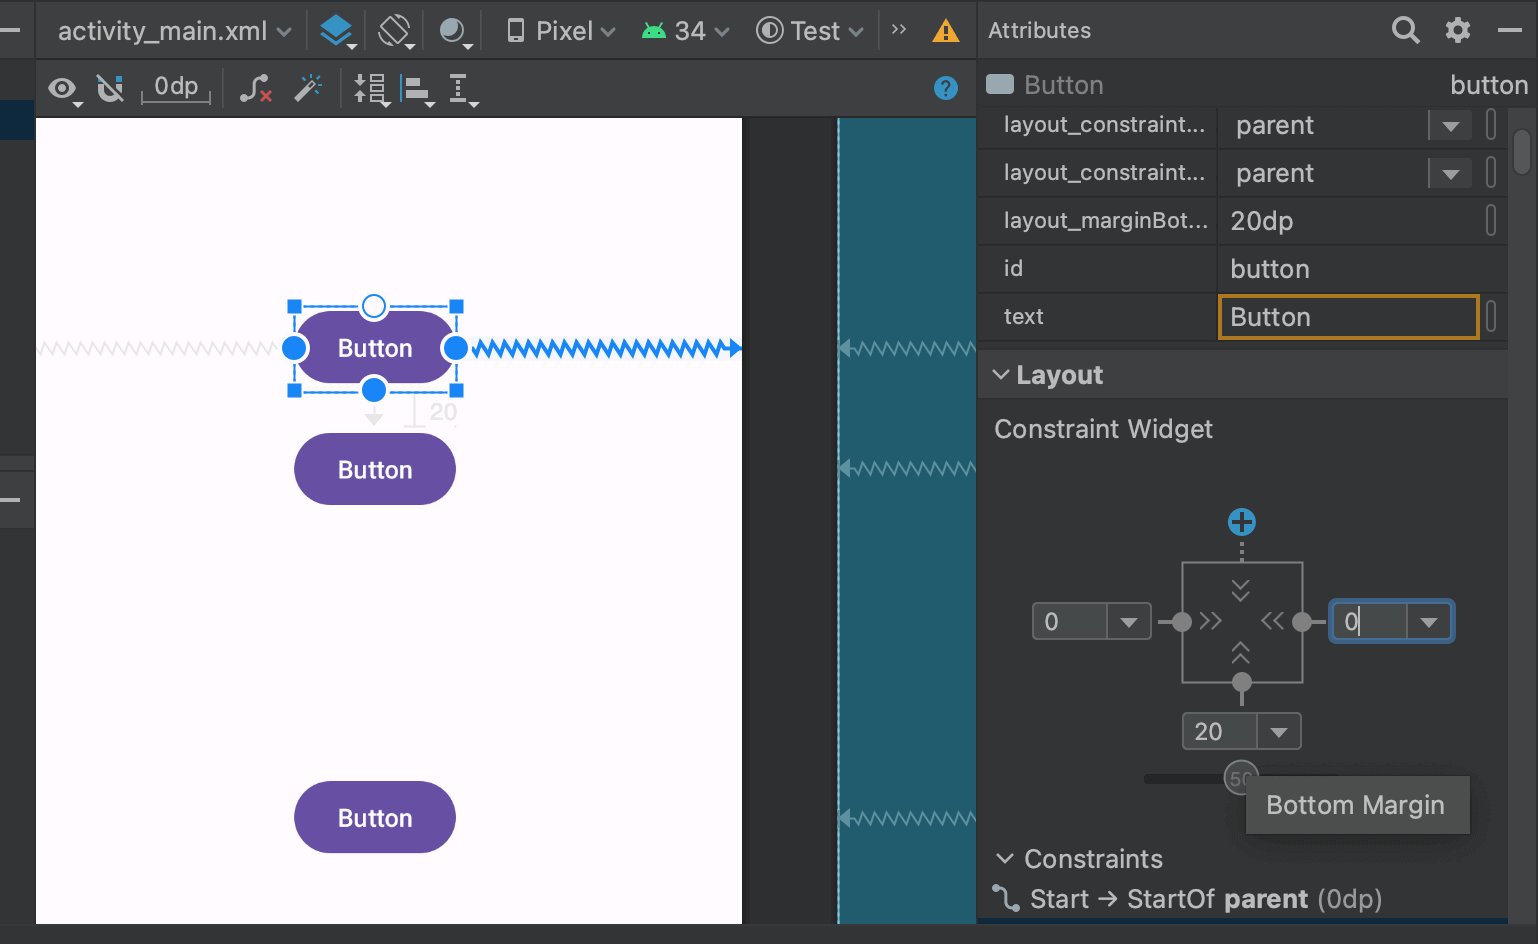
また制約的に配置したビューを基に相対的に配置することも可能です。例えば1番上のButtonを中心のButtonの上20の位置に配置したい場合は1番上のButtonの上側の制約を削除し「Attributes」の「Layout」>「Constraint Widgets」から数値を入力することで相対的に配置することが可能です。
<Button
    android:id="@+id/button"
    android:layout_width="wrap_content"
    android:layout_height="wrap_content"
    android:layout_marginBottom="20dp"
    android:text="Button"
    app:layout_constraintBottom_toTopOf="@+id/button2"
    app:layout_constraintEnd_toEndOf="parent"
    app:layout_constraintStart_toStartOf="parent" />

<Button
    android:id="@+id/button2"
    android:layout_width="wrap_content"
    android:layout_height="wrap_content"
    android:text="Button"
    app:layout_constraintBottom_toBottomOf="parent"
    app:layout_constraintEnd_toEndOf="parent"
    app:layout_constraintStart_toStartOf="parent"
    app:layout_constraintTop_toTopOf="parent" />

<Button
    android:id="@+id/button3"
    android:layout_width="wrap_content"
    android:layout_height="wrap_content"
    android:text="Button"
    app:layout_constraintBottom_toBottomOf="parent"
    app:layout_constraintEnd_toEndOf="parent"
    app:layout_constraintStart_toStartOf="parent"
    app:layout_constraintTop_toBottomOf="@+id/button2" />
app:layout_constraintXXXXX属性の種類
XMLで記述されたコードを見てみるとapp:layout_constraintXXXXX形式の属性がたくさん付与されています。これがConstraintLayoutで制約的に配置するために重要になってきます。
属性の名前が制約の条件を表しておりlayout_constraintBottom_toBottomOfならViewのBottomから指定したBottomに対して制約を付与することになります。
layout_constraint{自身の辺}_to{対象の辺}Of="対象のid"- Start:左
- End:右
- Top:上
- Bottom:下
StartとEndは端末をRTLモード(右読み言語に対応)変更した場合に左右が自動で入れ替わるようになっています。
位置を揃える
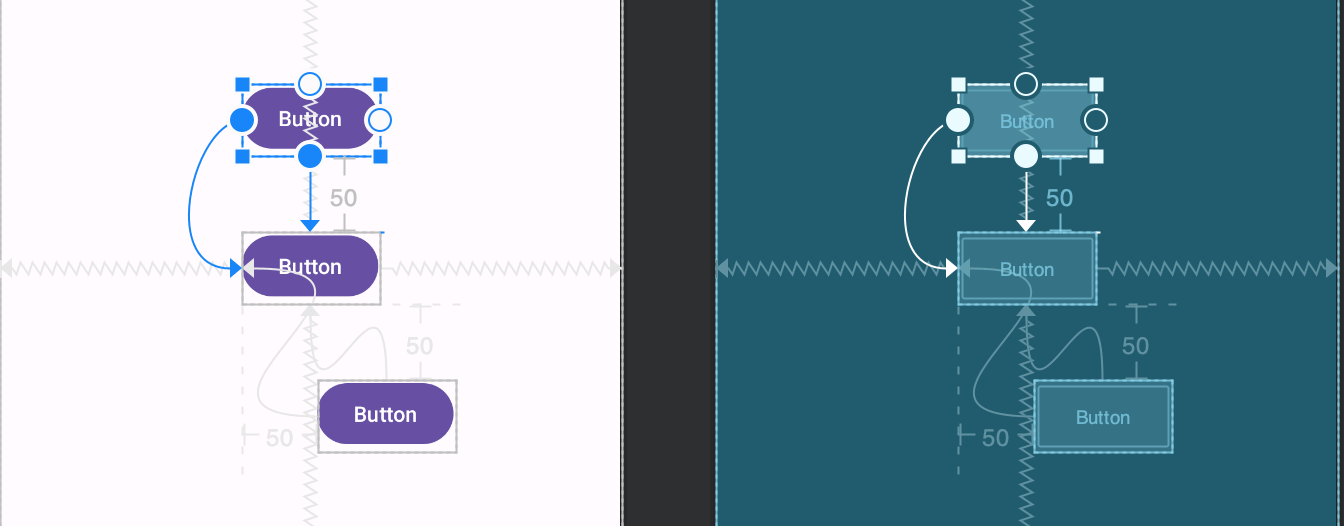
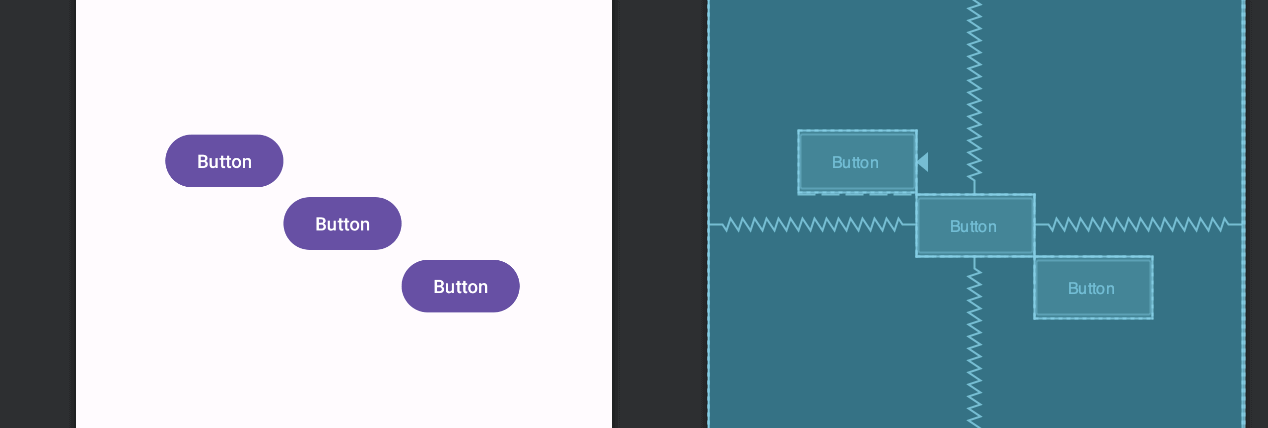
ある1つのビューの左辺に合わせて他のビューの位置を揃えることも可能になっています。例えば中心にあるButtonに左辺に揃うように上のButtonを配置したり、中心にあるButtonに左辺から指定した距離(今回は50)分だけずらして位置へ下のButtonを配置する場合は以下のようになります。
<Button
    android:id="@+id/button"
    android:layout_width="wrap_content"
    android:layout_height="wrap_content"
    android:layout_marginBottom="50dp"
    android:text="Button"
    app:layout_constraintBottom_toTopOf="@+id/button2"
    app:layout_constraintStart_toStartOf="@+id/button2" />

<Button
    android:id="@+id/button2"
    android:layout_width="wrap_content"
    android:layout_height="wrap_content"
    android:text="Button"
    app:layout_constraintBottom_toBottomOf="parent"
    app:layout_constraintEnd_toEndOf="parent"
    app:layout_constraintStart_toStartOf="parent"
    app:layout_constraintTop_toTopOf="parent" />

<Button
    android:id="@+id/button3"
    android:layout_width="wrap_content"
    android:layout_height="wrap_content"
    android:layout_marginStart="50dp"
    android:layout_marginTop="50dp"
    android:text="Button"
    app:layout_constraintStart_toStartOf="@+id/button2"
    app:layout_constraintTop_toBottomOf="@+id/button2" />
ベースラインを揃える
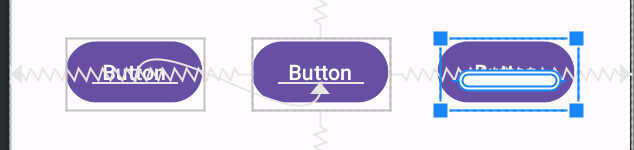
ビュー内のテキストの位置(ベースライン)で揃えることも可能です。そのためにはビューを右クリックし「Show Baseline」をクリックし、出てきたベースラインを合わせたいビューのベースラインと紐付けるだけです。
<Button
    android:id="@+id/button"
    android:layout_width="wrap_content"
    android:layout_height="wrap_content"
    android:text="Button"
    app:layout_constraintBaseline_toBaselineOf="@+id/button2"
    tools:layout_editor_absoluteX="37dp" />

<Button
    android:id="@+id/button2"
    android:layout_width="wrap_content"
    android:layout_height="wrap_content"
    android:text="Button"
    app:layout_constraintBottom_toBottomOf="parent"
    app:layout_constraintEnd_toEndOf="parent"
    app:layout_constraintStart_toStartOf="parent"
    app:layout_constraintTop_toTopOf="parent" />

<Button
    android:id="@+id/button3"
    android:layout_width="wrap_content"
    android:layout_height="wrap_content"
    android:text="Button"
    app:layout_constraintBaseline_toBaselineOf="@+id/button2"
    tools:layout_editor_absoluteX="284dp" />
Chains
ChainsとはConstraintLayoutで使用できる水平方向または垂直方向に複数のビューをリンクさせて配置方法です。
相対的に配置する:RelativeLayout
Widgetsを相対的に配置したい場合はRelativeLayoutを使用することでも簡単に実装できます。
縦並び/横並びに配置する
Widgetsを横並びや縦並びにしたい場合はLinearLayoutを使用することで簡単に実装できます。

まだまだ勉強中ですので間違っている点や至らぬ点がありましたら教えていただけると助かります。
ご覧いただきありがとうございました。