【Kotlin】簡単なAndroidアプリの作り方!Android Studioの使い方
この記事からわかること
- Android Studioで簡単なアプリを開発する方法
- Kotlinの使い方
- プロジェクトのファイル構造
- activity_main.xmlファイルとは?
- ボタンをクリックで文字を表示するアプリの作り方
- 「Unresolved reference: Button」と「Not enough information to infer type variable T」とは?
index
[open]
\ アプリをリリースしました /


参考文献: 公式リファレンス:Android Kotlin の基礎
今回は初心者向けにAndroidアプリを「Android Studio」を使用して開発する流れを見ていきます。とても簡単なボタンと文字だけ表示するアプリを作っていきます。
Androidアプリを開発するために必要なもの
- 開発環境:Android Studio
- 開発言語:Java or Kotlin
- アカウント:Googleアカウント
- PC:Windows or Mac
開発環境:Android Studio
Androidアプリを開発するためには「Android Studio」という統合開発環境(IDE)が必要になります。公式サイトから無料で簡単にインストールすることができます。
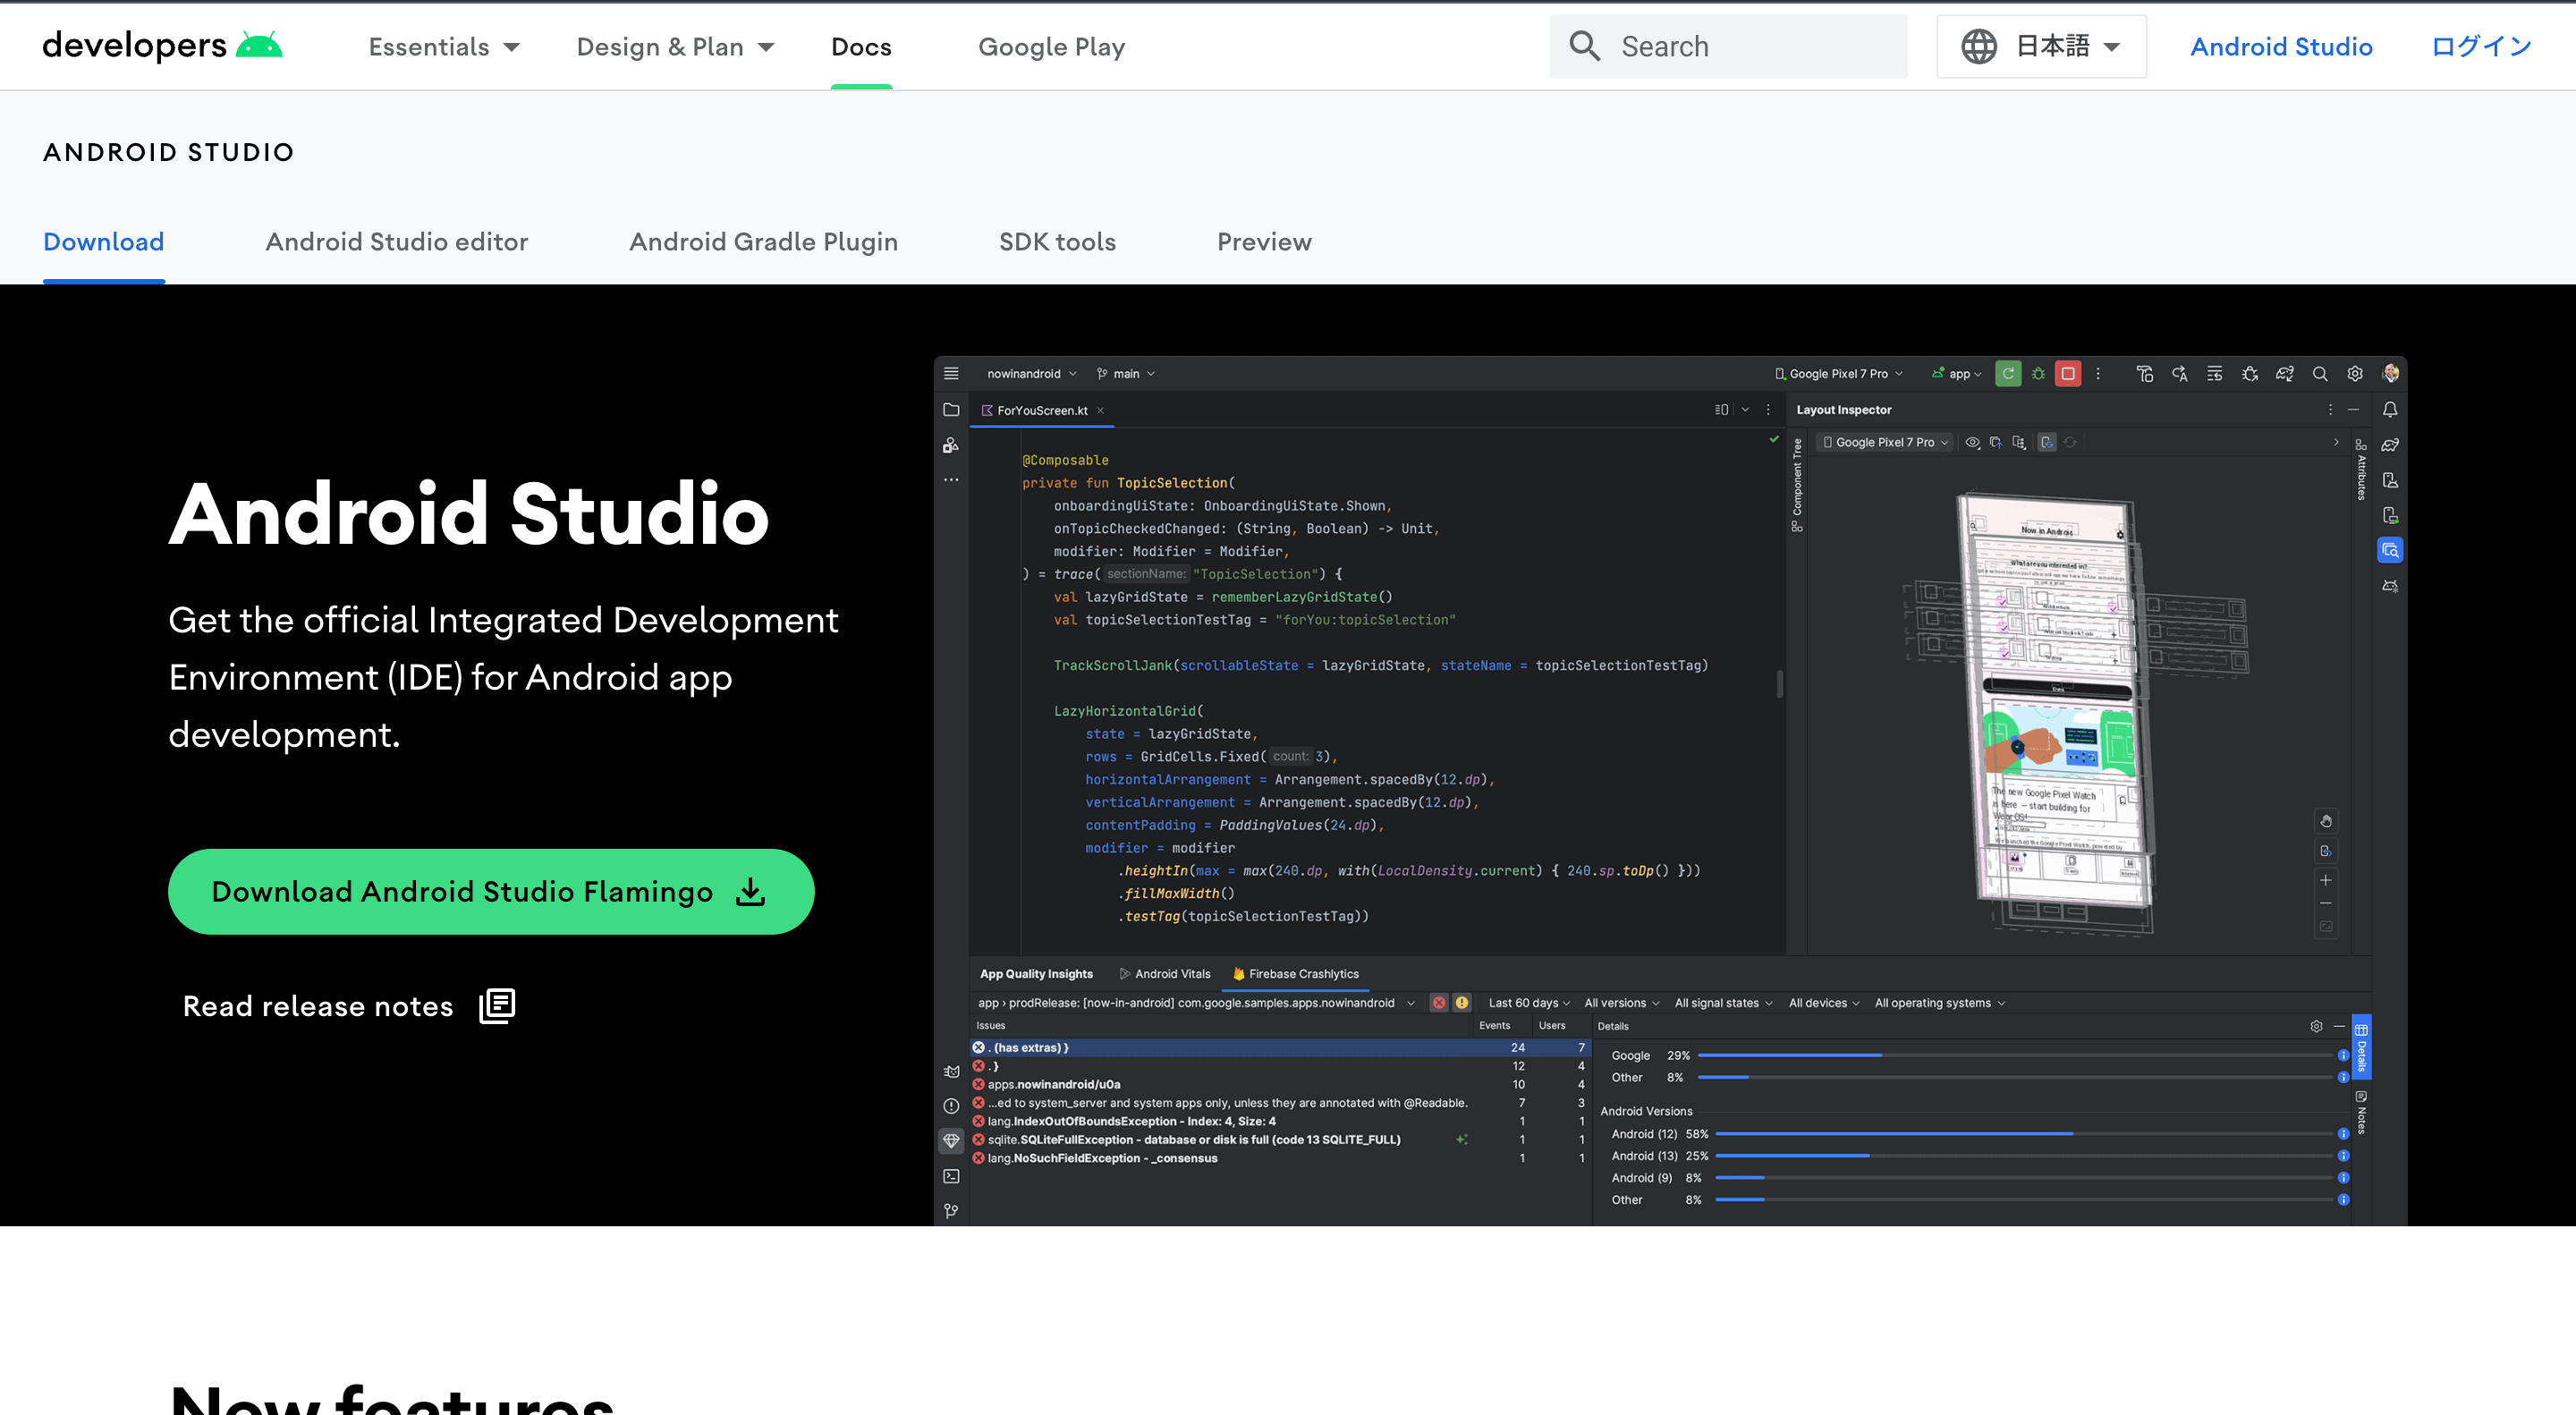
「Android Studio」だけでエディタやデバッガー、エミュレーターなどアプリ開発に必要な環境を整えることが可能です。
開発言語:Java or Kotlin
Androidアプリの開発言語は「Java」もしくは「Kotlin(コトリン)」です。最近はKotlinを使用した開発が増えてきています。
Googleアカウント
AndroidはGoogleが提供しているOSなのでGoogleアカウントが必要になります。実際にGoogle Playストアへアプリを公開する際に使うことになるので取得しておく必要があります。
PC:Windows or Mac
開発するためのPCはWindowsでもMacでもどちらでもOKです。iOSアプリを開発するためにはApple製品でないと開発ができませんが、Googleは両者ともに対応しています。
プロジェクトの作成とセットアップ
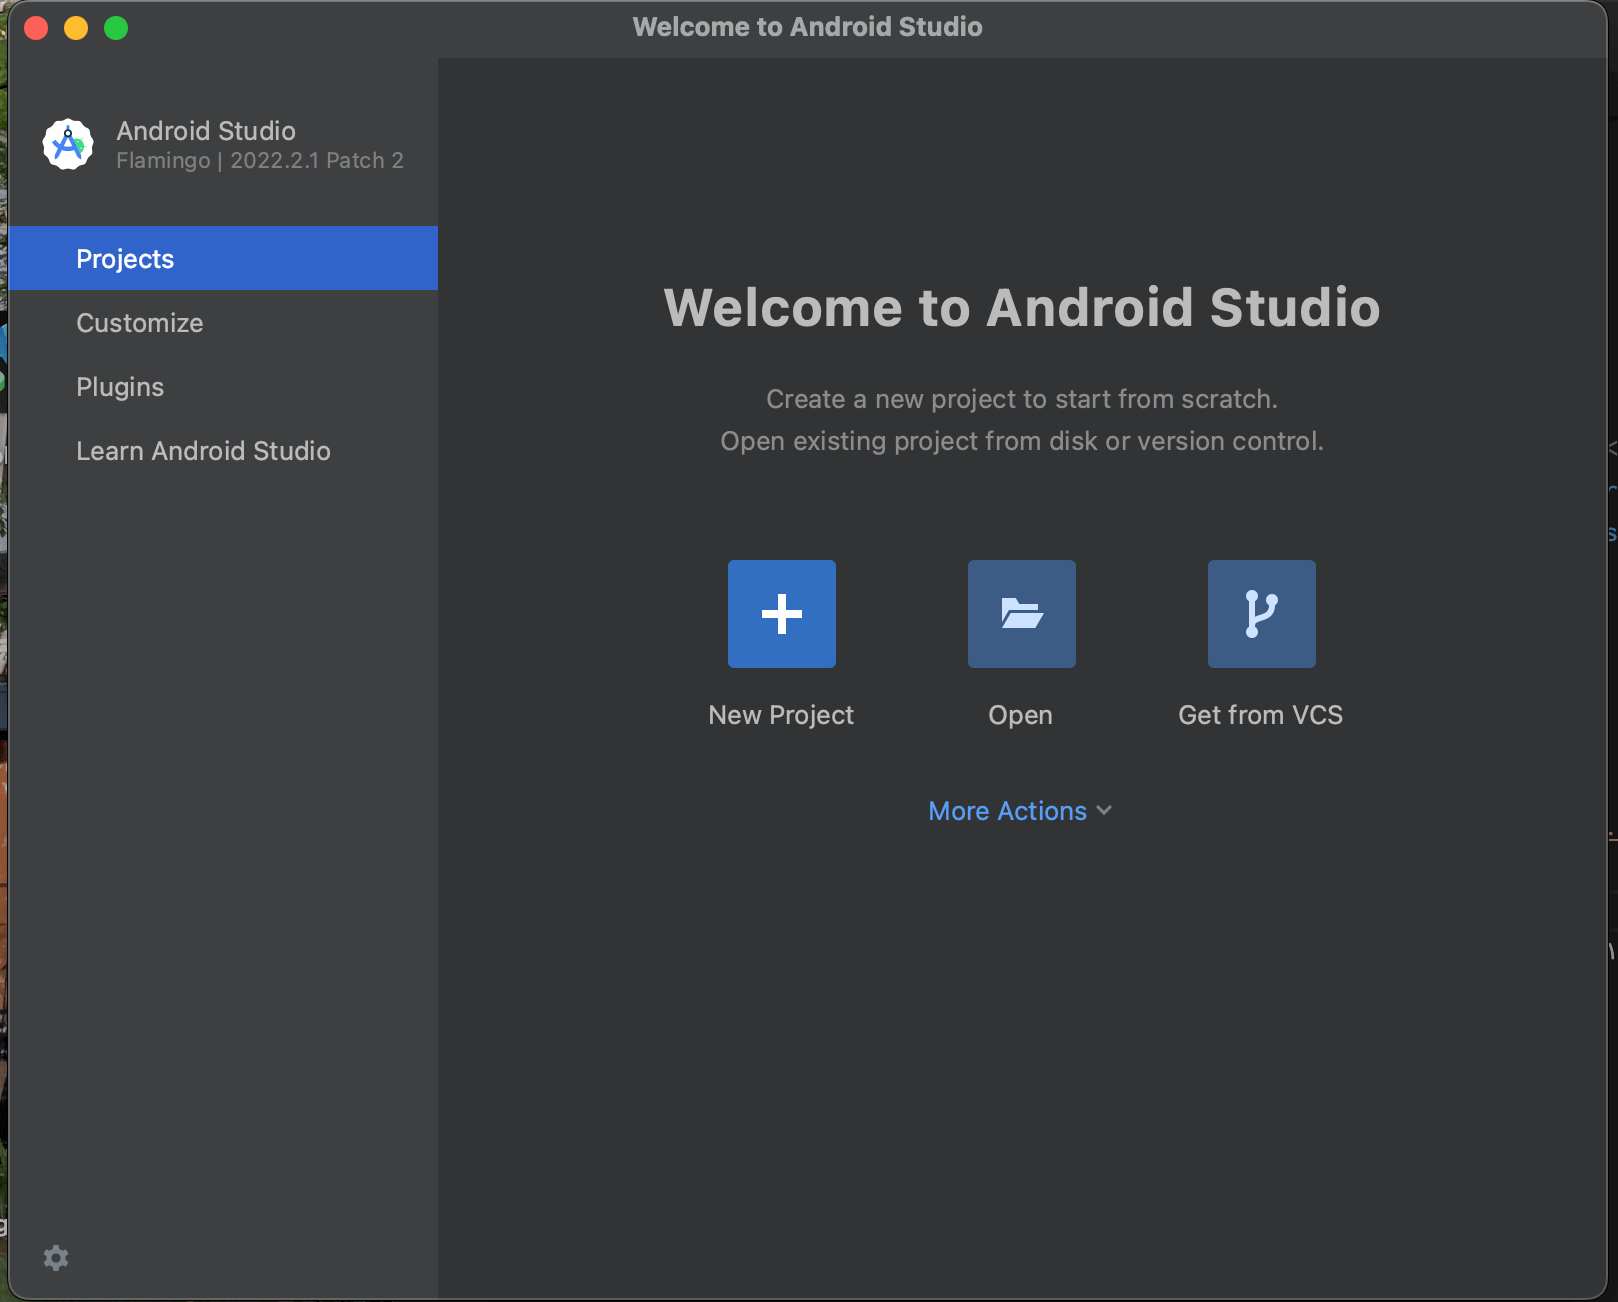
では実際にAndroid Studioを使用しながらアプリを開発する流れを見ていきたいと思います。Android Studioを起動して「New Project」を選択します。
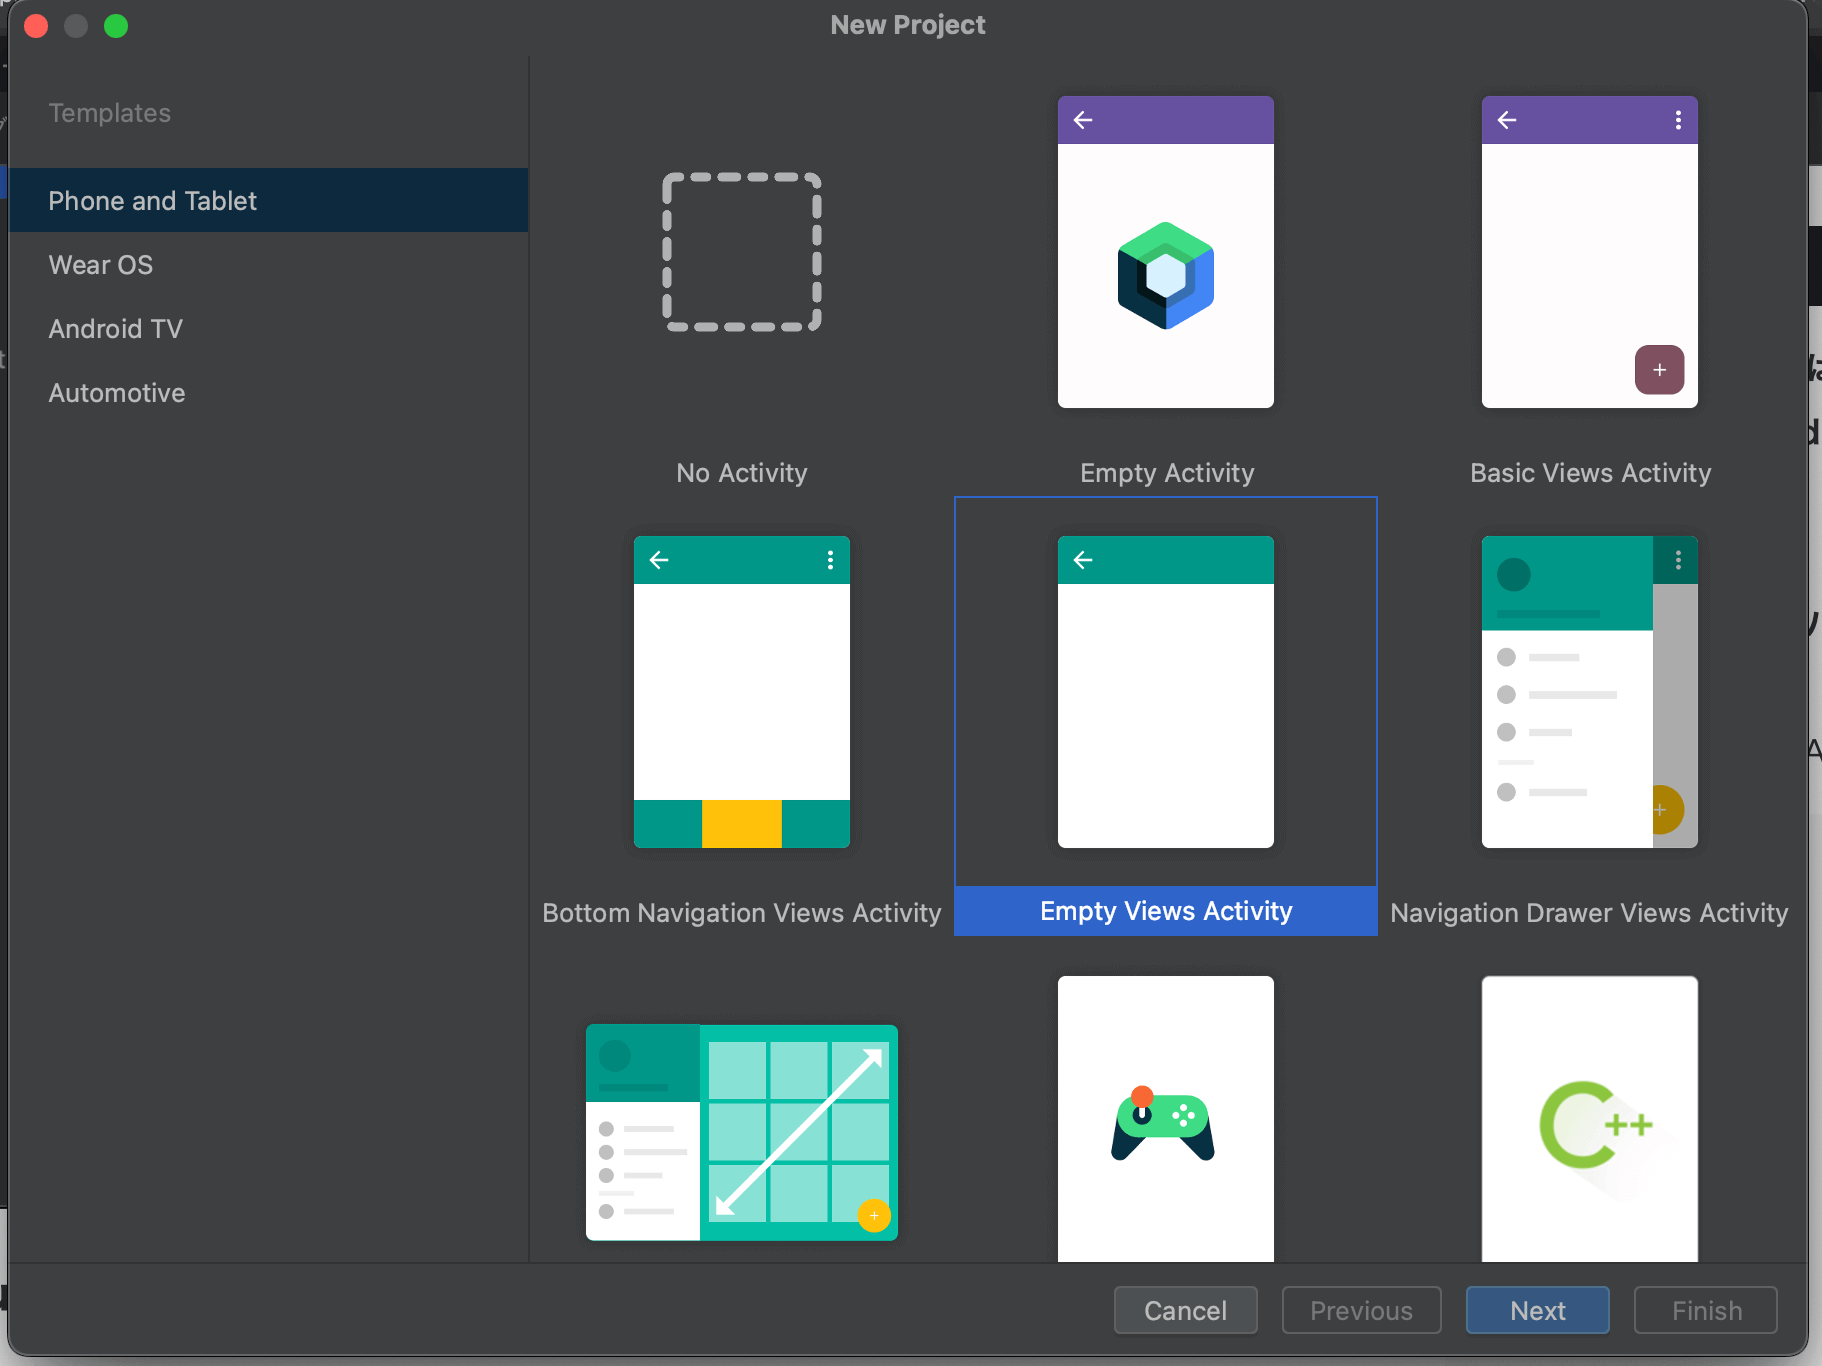
続いて「Empty View Activity」をクリックします。
次に「プロジェクト名」、「保存する先」「使用する言語」、「Minimum SDK(対応するAndroidバージョン)」を選択します。「保存する先」はデフォルトではAndroid Studioと同階層になっているので「Desktop/プロジェクト名」と選択すると良いです。
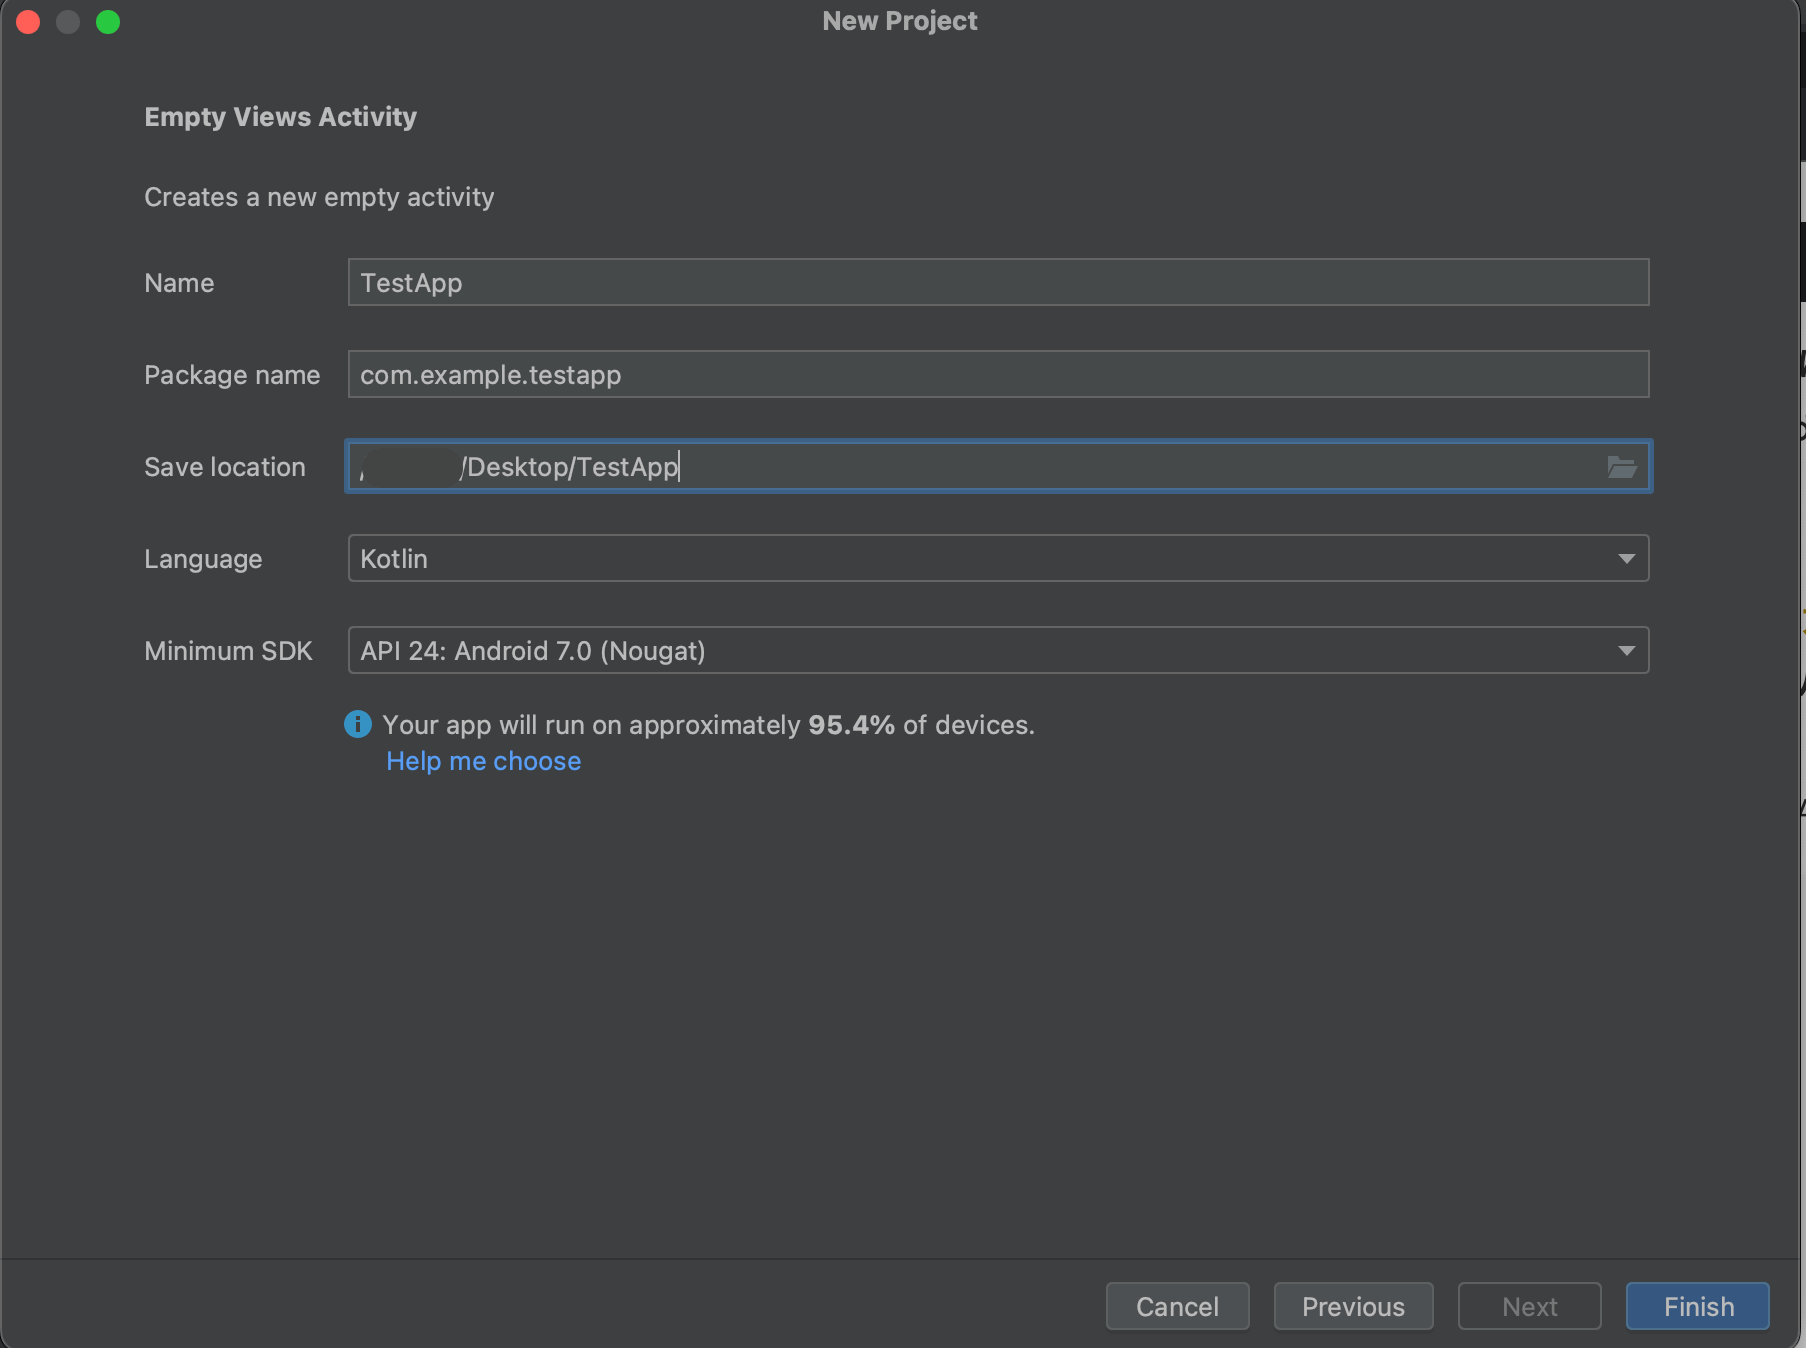
「Finish」を押すと生成が始まり以下の画面が開きます。この画面になってもしばらくローディングしているので左側にフォルダ構造が表示されたら開発する準備は完了です。
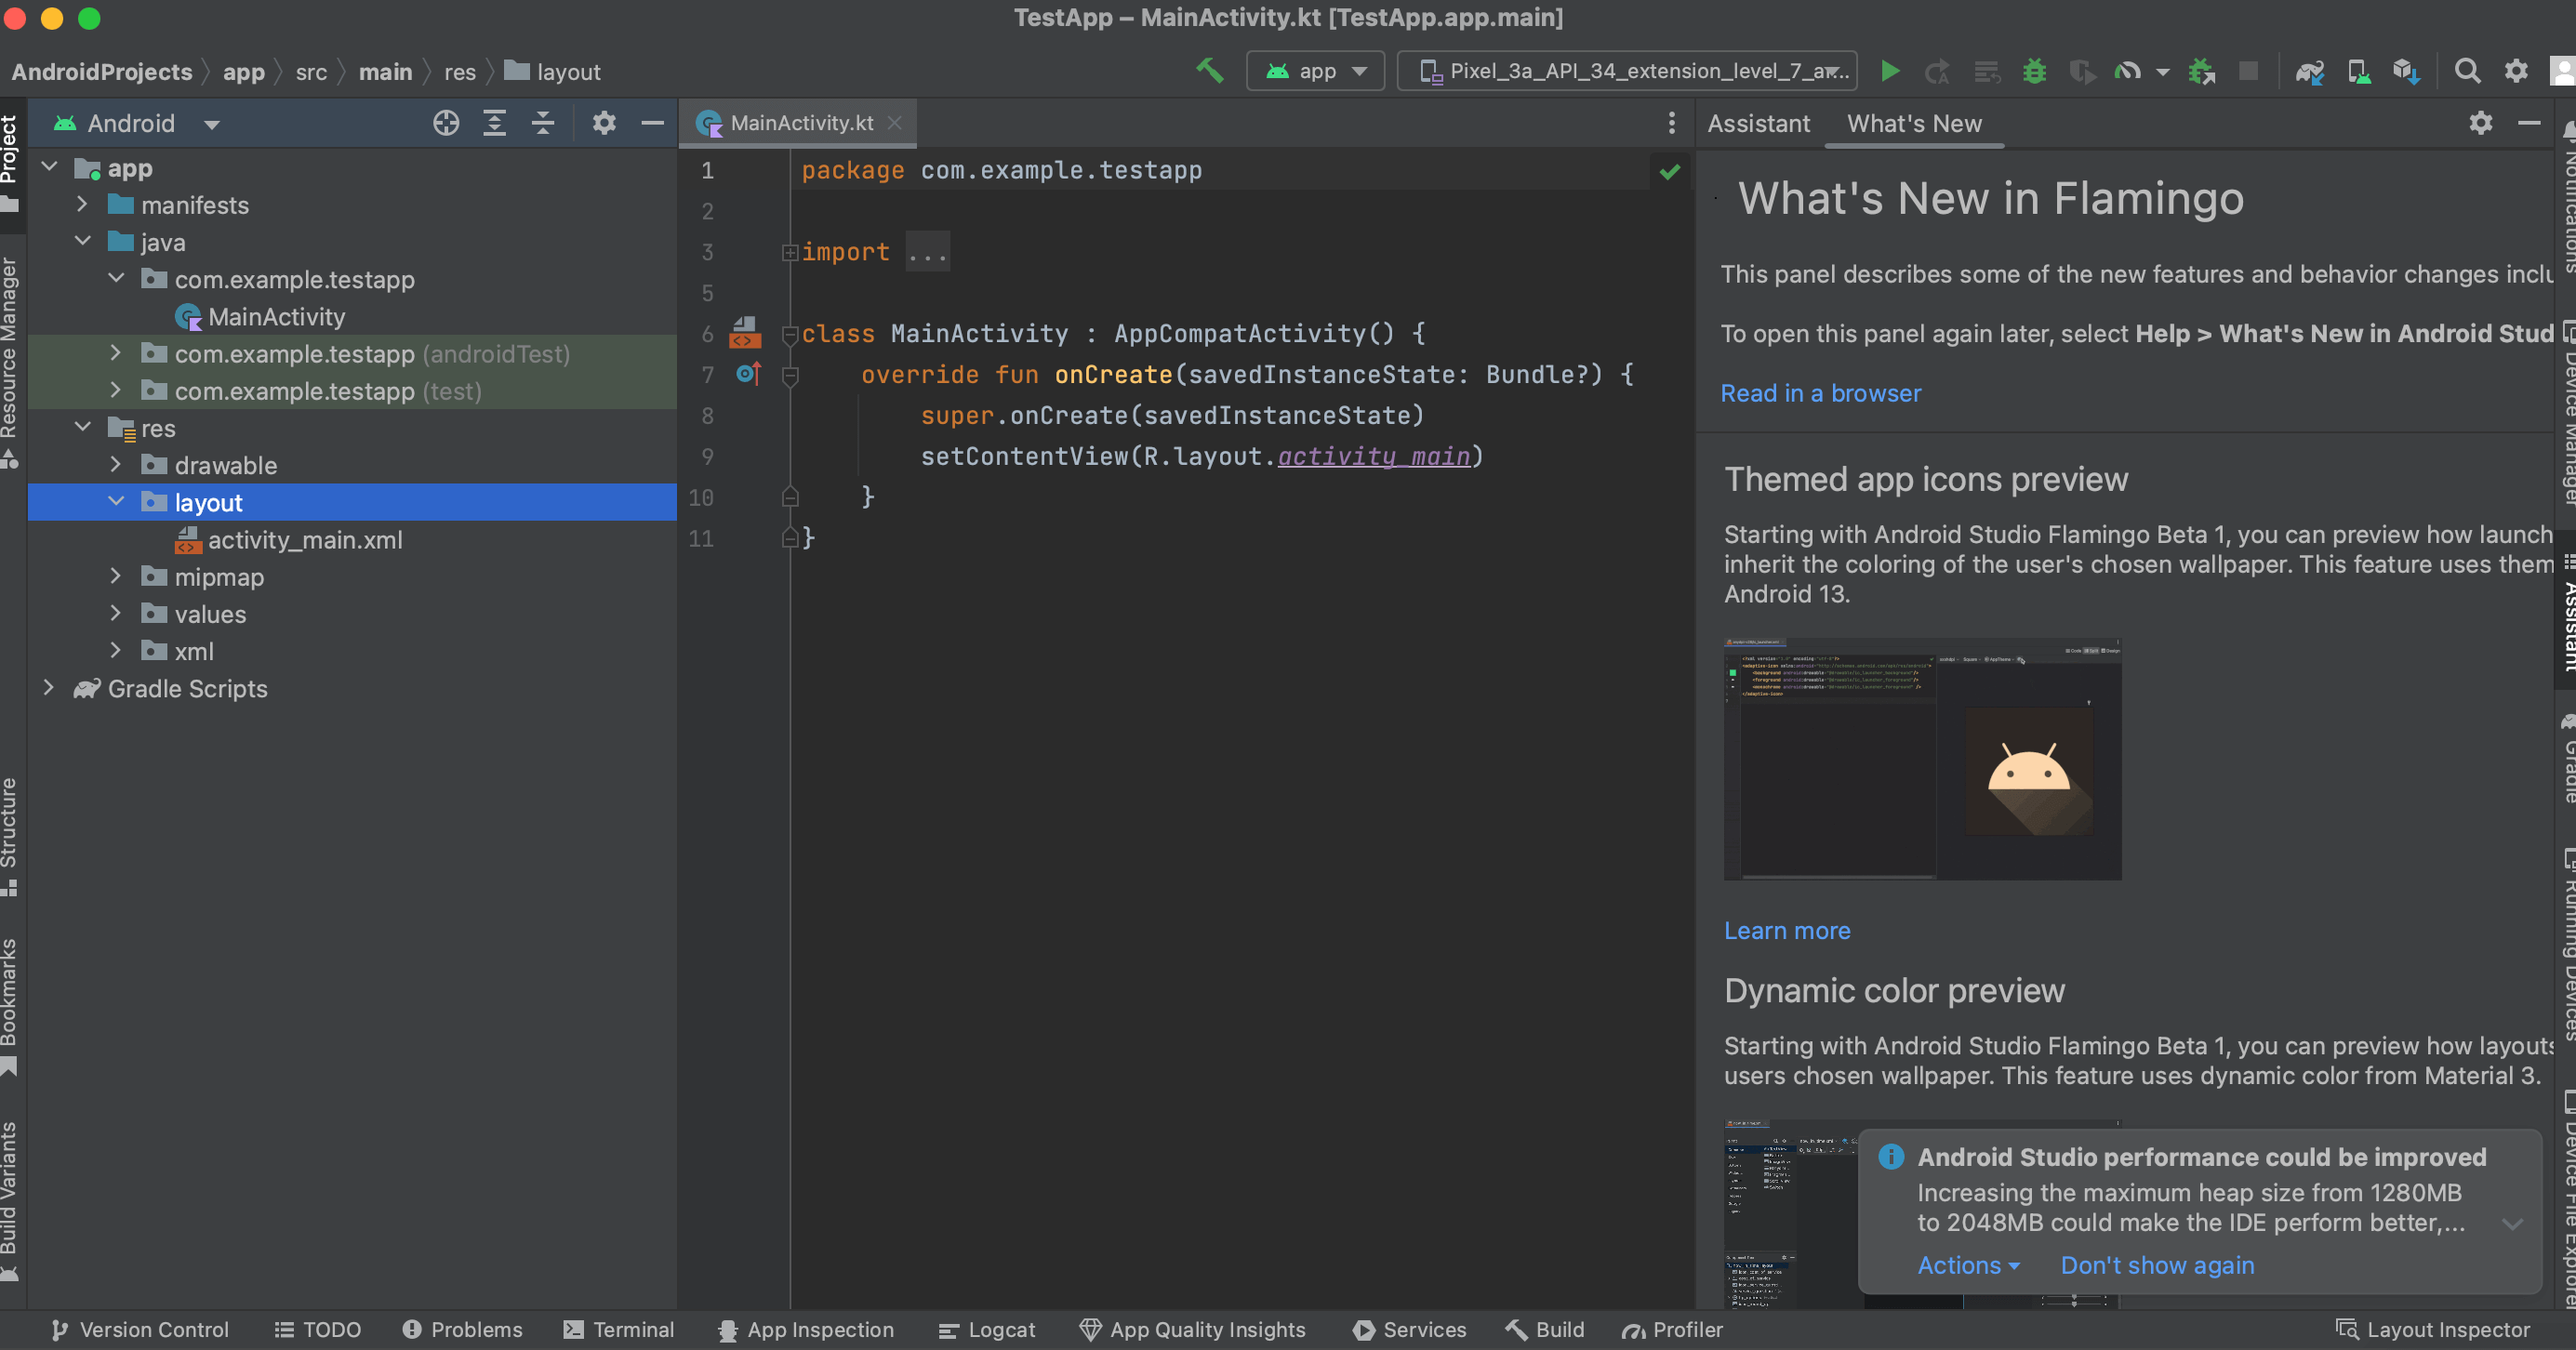
ファイル構造
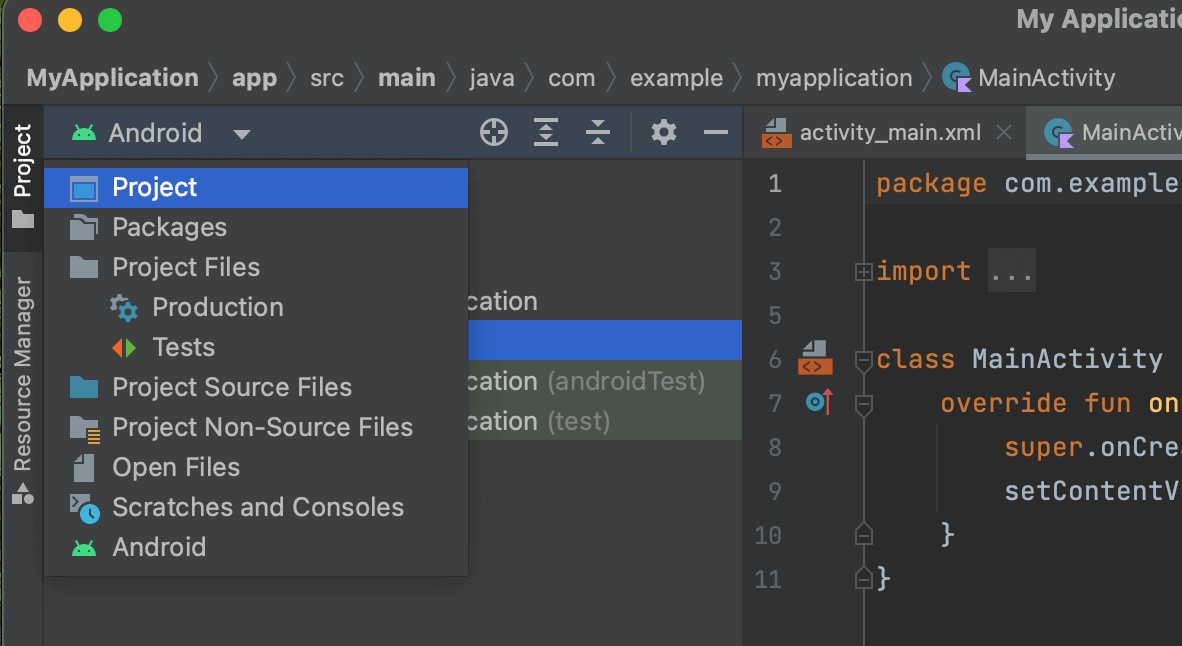
左側にフォルダ構造が確認できますが、これは実際のフォルダの構造とは異なりAndroidを開発する上でわかりやすいようになっているようです。実際のフォルダ構造にするには「 Android」となっている部分をクリックし「Project」に変更することで切り替わります。
├── app ・・・プロジェクトのルート
│ ├── manifest ・・・アプリケーションの設定や構成情報
│ ├── java ・・・慣習的にjavaになっている
│ ├── com.example.app
│ └── MainActivity.kt ・・・メインのロジックktファイル
│ ├── com.example.app(androidTest) ・・・Androidのユニットテスト用
│ └── com.example.app(test) ・・・アプリのユニットテスト用
│ ├── res ・・・リソースファイルを含むディレクトリ
│ ├── drawable ・・・画像ファイルなど
│ ├── layout ・・・UIのレイアウト
│ └── activity_main.xml ・・・メインのUIレイアウトxmlファイル
│ ├── mipmap ・・・アイコンファイル
│ ├── values ・・・リソースの値を定義するXMLファイル群
│ ├── colors.xml ・・・アプリのカラー定義
│ ├── strings.xml ・・・アプリの文字列定義
│ └── themes/ ・・・アプリのテーマ定義
│ └── xml ・・・その他のXMLファイル
├── Gradle Script ・・・Gradleのビルドスクリプト
大体のファイルの役割は上記の通りです。最初の内によく触るのは「java」>「com.example.app」内と「res」>「layout」内が多いかもしれません。
layout > activity_main.xmlとは?
「activity_main.xml」はアプリのUI部分を構築するためのファイルです。ダブルクリックして開いてみると以下のようにXML形式のコードとプレビューが表示されます。表示されない場合は一番右の「Code」「Split」「Design」の「Split」を選択してください。
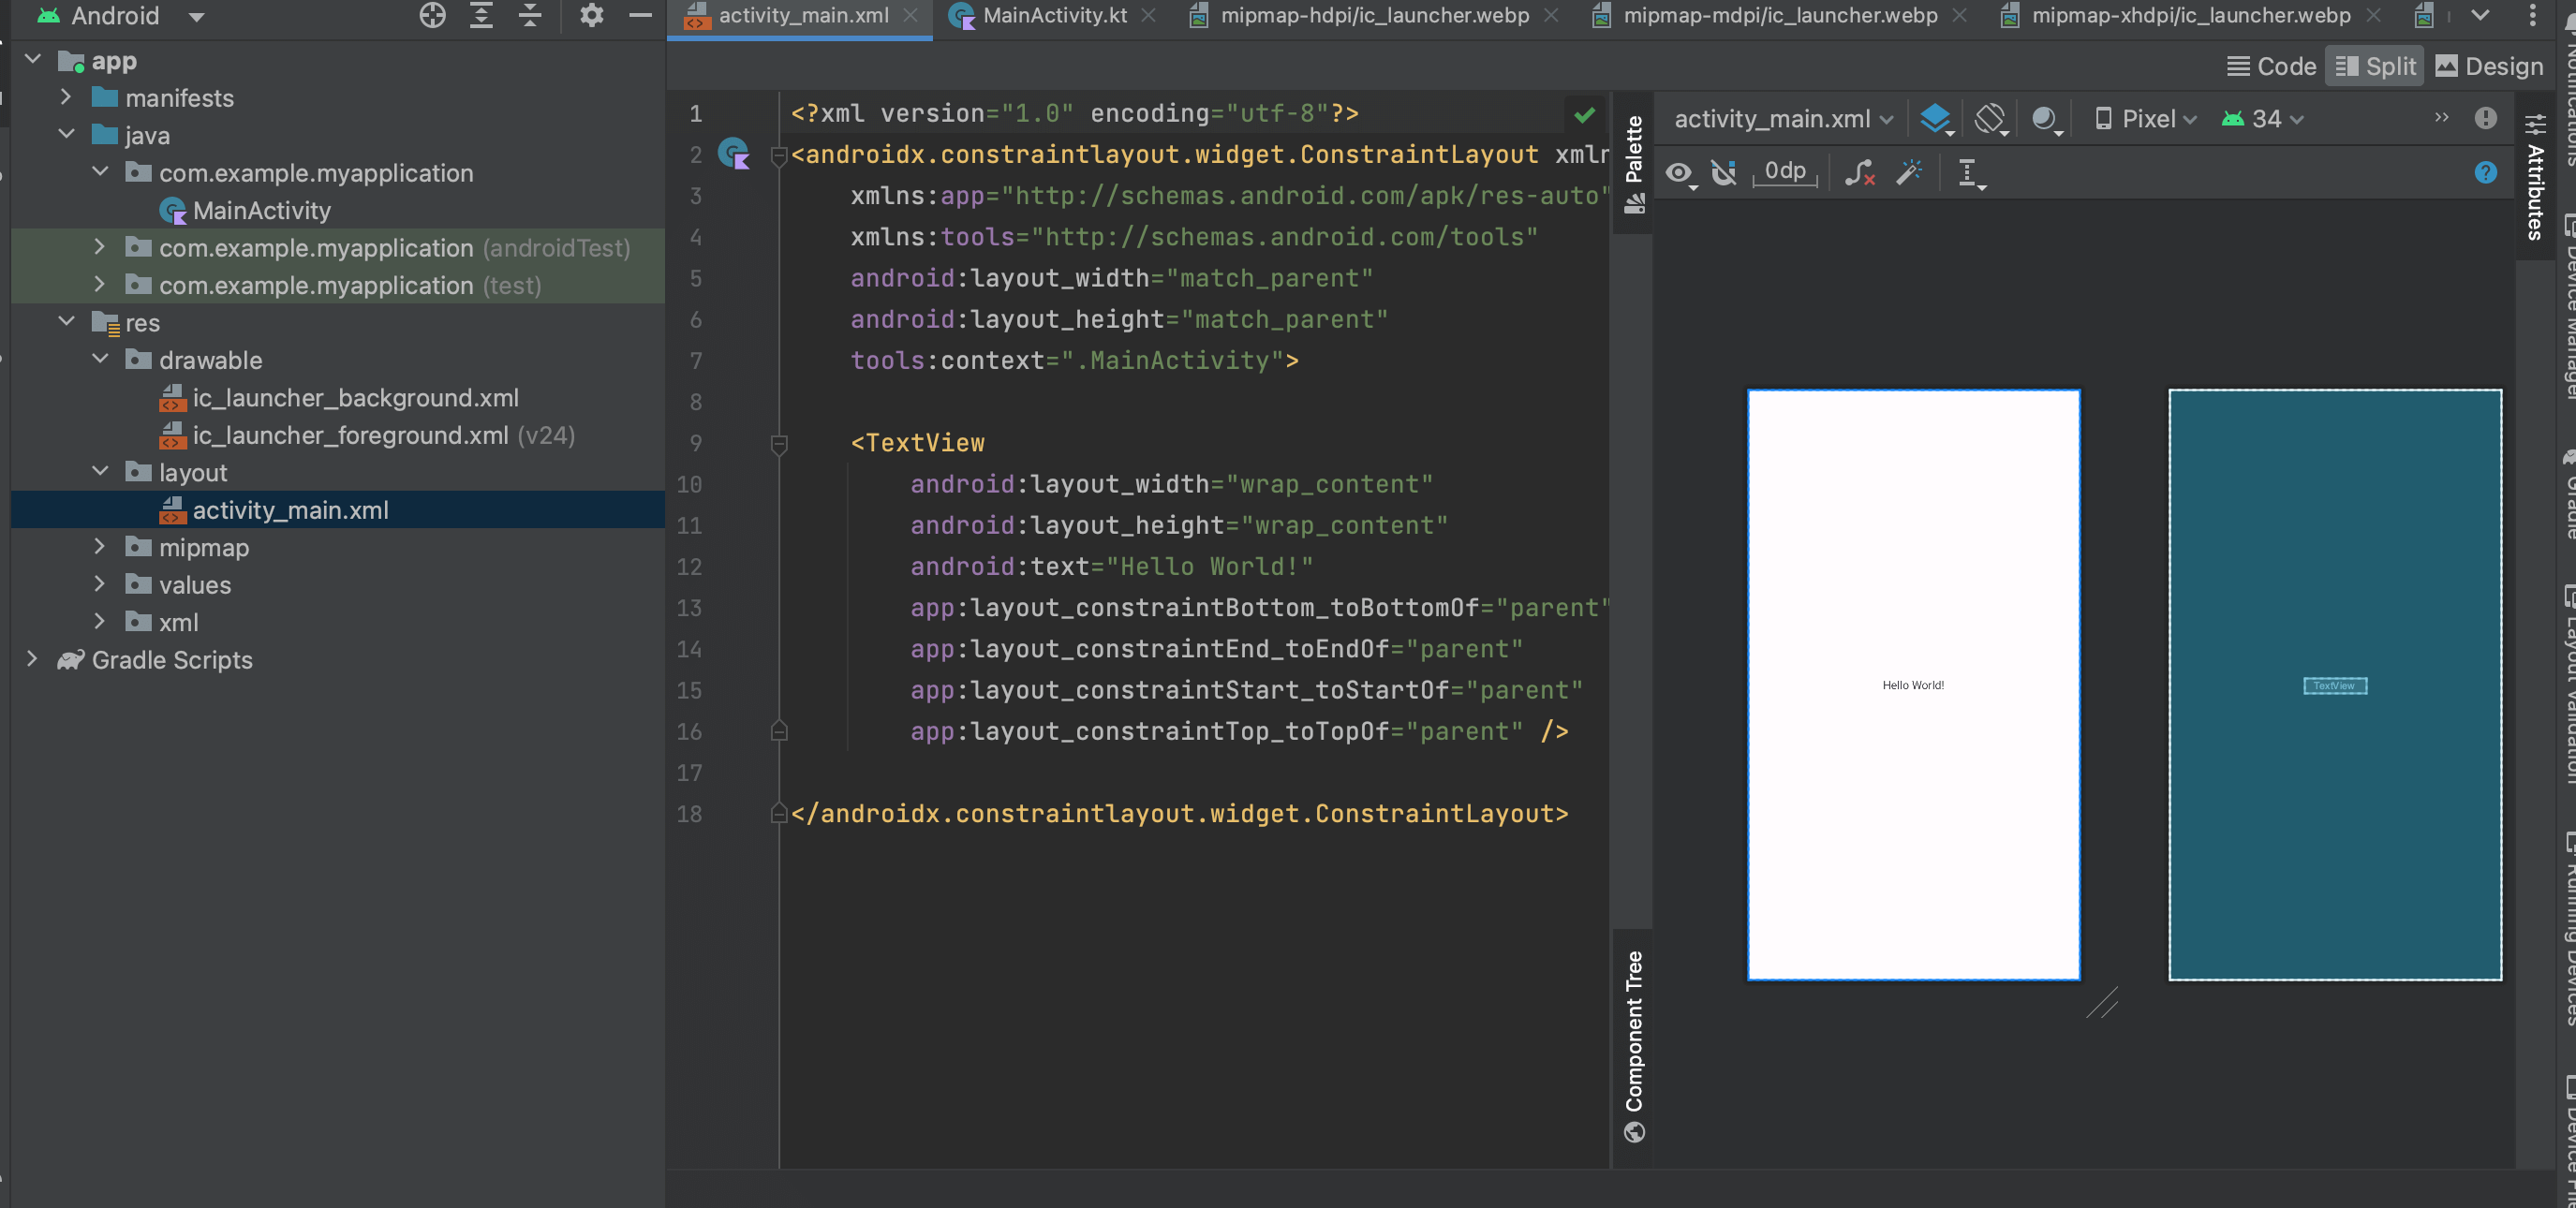
最初の状態ではアプリの画面に「Hello World!」と表示されています。これを構築しているのが右側のXMLのコードです。ConstraintLayoutは画面全体のレイアウト部分を司っており、中にTextViewが見えます。
<?xml version="1.0" encoding="utf-8"?>
<androidx.constraintlayout.widget.ConstraintLayout xmlns:android="http://schemas.android.com/apk/res/android"
xmlns:app="http://schemas.android.com/apk/res-auto"
xmlns:tools="http://schemas.android.com/tools"
android:layout_width="match_parent"
android:layout_height="match_parent"
tools:context=".MainActivity">
<TextView
android:layout_width="wrap_content" ⇦ Viewの幅
android:layout_height="wrap_content" ⇦ Viewの高さ
android:text="Hello World!" ⇦ Viewのテキスト
app:layout_constraintBottom_toBottomOf="parent" ⇦ Viewの位置(bottom)
app:layout_constraintEnd_toEndOf="parent" ⇦ Viewの位置(End)
app:layout_constraintStart_toStartOf="parent" ⇦ Viewの位置(Start)
app:layout_constraintTop_toTopOf="parent" ⇦ Viewの位置(Top)
/>
</androidx.constraintlayout.widget.ConstraintLayout>
TextViewの属性としてandroid:*という形式でViewに対しての定義を施していきます。例えばandroid:layout_widthはViewの横幅を定義する属性でwrap_contentという値が渡されています。
渡せる値:wrap_content/match_parent
渡せる値はwrap_contentといった定数のようなものと400dpや30spといった数値と単位を組み合わせたものです。TextViewにはwrap_contentが渡されていたので中のテキストの量にフィットする大きさに自動で変化します。
- wrap_content・・・要素の大きさに合わせて動的変化
- match_parent・・・親の要素と同じ大きさ
- dp / sp / in / px / pt ・・・Viewにはdp テキストにはsp
- @XXXXX ・・・後述しますがidやリソースなどを参照
おすすめ記事:【Android Studio/Kotlin】dpとsp、px、pt、inの違いや使い方!サイズの指定方法
Buttonを追加してみる
では上記に倣ってボタンを追加してみます。まずは以下の通りに記述します。
<Button
android:layout_width="wrap_content"
android:layout_height="wrap_content"
android:text="tap"
/>
この状態ではまだViewの位置を指定していないので画面の左上部に行ってしまいます。表示されているTextViewの下に持ってきたいので以下のように修正します。ついでに文字サイズも修正しておきます。
<TextView
android:id="@+id/text" ⇦ 追加
android:layout_width="wrap_content"
android:layout_height="wrap_content"
android:text="Hello World!"
android:textSize="30sp" ⇦ 追加
app:layout_constraintBottom_toBottomOf="parent"
app:layout_constraintEnd_toEndOf="parent"
app:layout_constraintStart_toStartOf="parent"
app:layout_constraintTop_toTopOf="parent" />
<Button
android:id="@+id/button" ⇦ 追加
android:layout_width="wrap_content"
android:layout_height="wrap_content"
android:text="tap"
app:layout_constraintTop_toBottomOf="@id/text" ⇦ 追加
app:layout_constraintStart_toStartOf="parent" ⇦ 追加
app:layout_constraintEnd_toEndOf="parent" ⇦ 追加
app:layout_constraintBottom_toBottomOf="parent" ⇦ 追加
/>
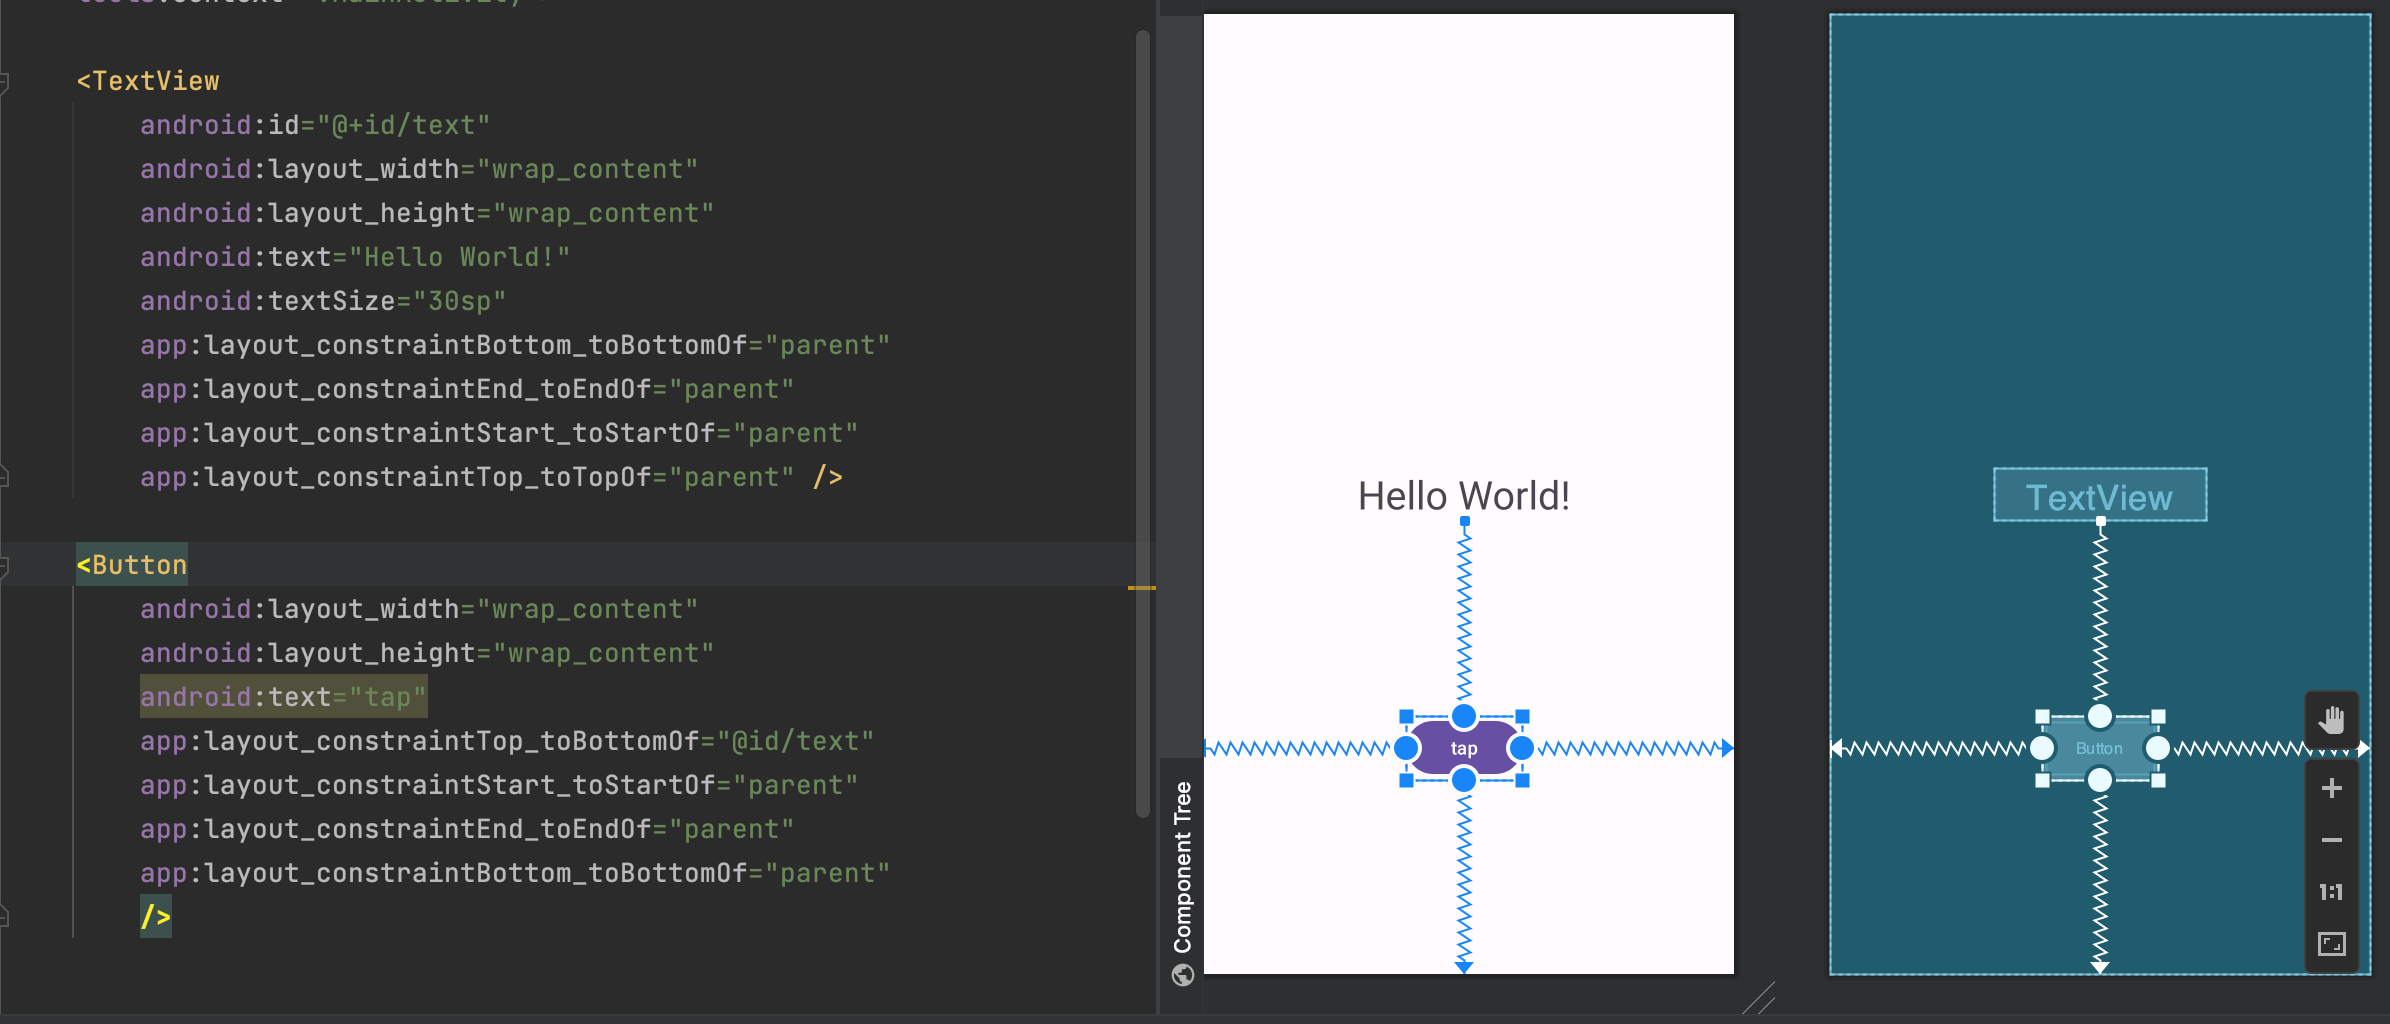
ここで文字サイズの指定に30spがViewの位置調整に@id/textが登場しました。まずapp:layout_constraintTop_toBottomOfはこのView(Button)のTopを指定したBottomの下に持ってくる制約をつける属性です。そこに@id/textで対象のViewを指定しています。IDにtextが付いているのはandroid:id="@+id/text"を付与したViewTextです。付与するときは@+id指定するときは@idになります。
文字のハードコードを防ぐ:strings.xml
TextViewやButtonの文字はandroid:text="文字列"属性に文字列をそのまま渡して指定していましたが、汎用性が少なく、同じ文字列を流用する場合やロケール(国など)が異なる時にすべて書き直すなどといったことになってしまいます。そんな文字のハードコード(ベタがき)を防ぐためにstrings.xmlを使用します。
<resources>
<string name="app_name">My Application</string>
<string name="text_view_label">Hello World!</string> ⇦ 追加
<string name="button_label">tap</string> ⇦ 追加
</resources>
strings.xmlには参照するIDとなるname属性と実際の文字列を渡します。activity_main.xml側では@string/text_view_labelのように指定します。
<TextView
android:id="@+id/text"
android:layout_width="wrap_content"
android:layout_height="wrap_content"
android:text="@string/text_view_label" ⇦ 編集
android:textSize="30sp"
app:layout_constraintBottom_toBottomOf="parent"
app:layout_constraintEnd_toEndOf="parent"
app:layout_constraintStart_toStartOf="parent"
app:layout_constraintTop_toTopOf="parent" />
<Button
android:id="@+id/button"
android:layout_width="wrap_content"
android:layout_height="wrap_content"
android:text="@string/button_label" ⇦ 編集
app:layout_constraintTop_toBottomOf="@id/text"
app:layout_constraintStart_toStartOf="parent"
app:layout_constraintEnd_toEndOf="parent"
app:layout_constraintBottom_toBottomOf="parent"
/>
ボタンのアクションを定義する
今のままではボタンをクリックしても何も起こらないのでアクション部分をMainActivity.ktに定義していきます。ここまではずっとXMLを記述してきましが次はKotlinになります。デフォルトで定義されているMainActivityはAndroidアプリのライフサイクルの要部分であり、Activityが生成されたときに自動でonCreateメソッドが実行されます。
package com.example.myapplication
import androidx.appcompat.app.AppCompatActivity
import android.os.Bundle
class MainActivity : AppCompatActivity() {
override fun onCreate(savedInstanceState: Bundle?) {
super.onCreate(savedInstanceState)
setContentView(R.layout.activity_main)
}
}
ここにアクション部分を記述していきます。まずはMainActivity.kt側から追加したViewを参照するためのコードを記述します。
override fun onCreate(savedInstanceState: Bundle?) {
super.onCreate(savedInstanceState)
setContentView(R.layout.activity_main)
val text_view:TextView = findViewById(R.id.text) ⇦ 追加
val button:Button = findViewById(R.id.button) ⇦ 追加
}
この際に上記の2行をコピペするとUnresolved reference: ButtonやNot enough information to infer type variable Tといったエラーが発生してしまいます。
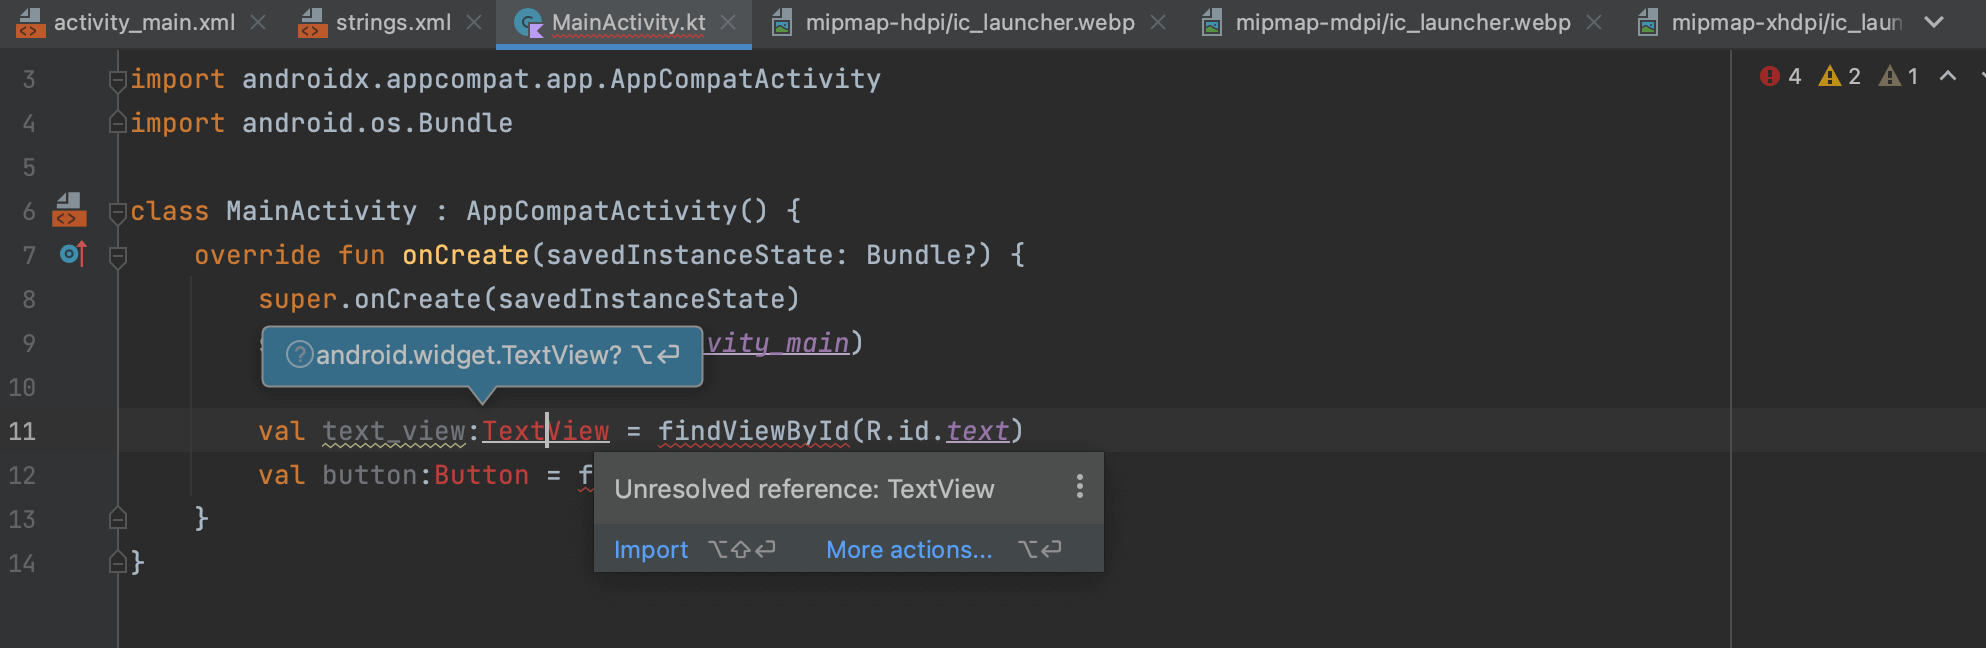
これは本来であればTextViewとButtonの型を参照できるように以下のようにimport文が必要になるのですが、先ほどの2行を1文字ずつ入力していくと自動で対象のimport文を補完してくれますが、コピペだと対応できずエラーになるようです。
import androidx.appcompat.app.AppCompatActivity
import android.os.Bundle
import android.widget.Button ⇦ 追加
import android.widget.TextView ⇦ 追加
またfindViewByIdの記述方法は以下の通りでも同義になります。
val button:Button = findViewById(R.id.button)
val button = findViewById<Button>(R.id.button)
val button = findViewById(R.id.button) as Button
setOnClickListener
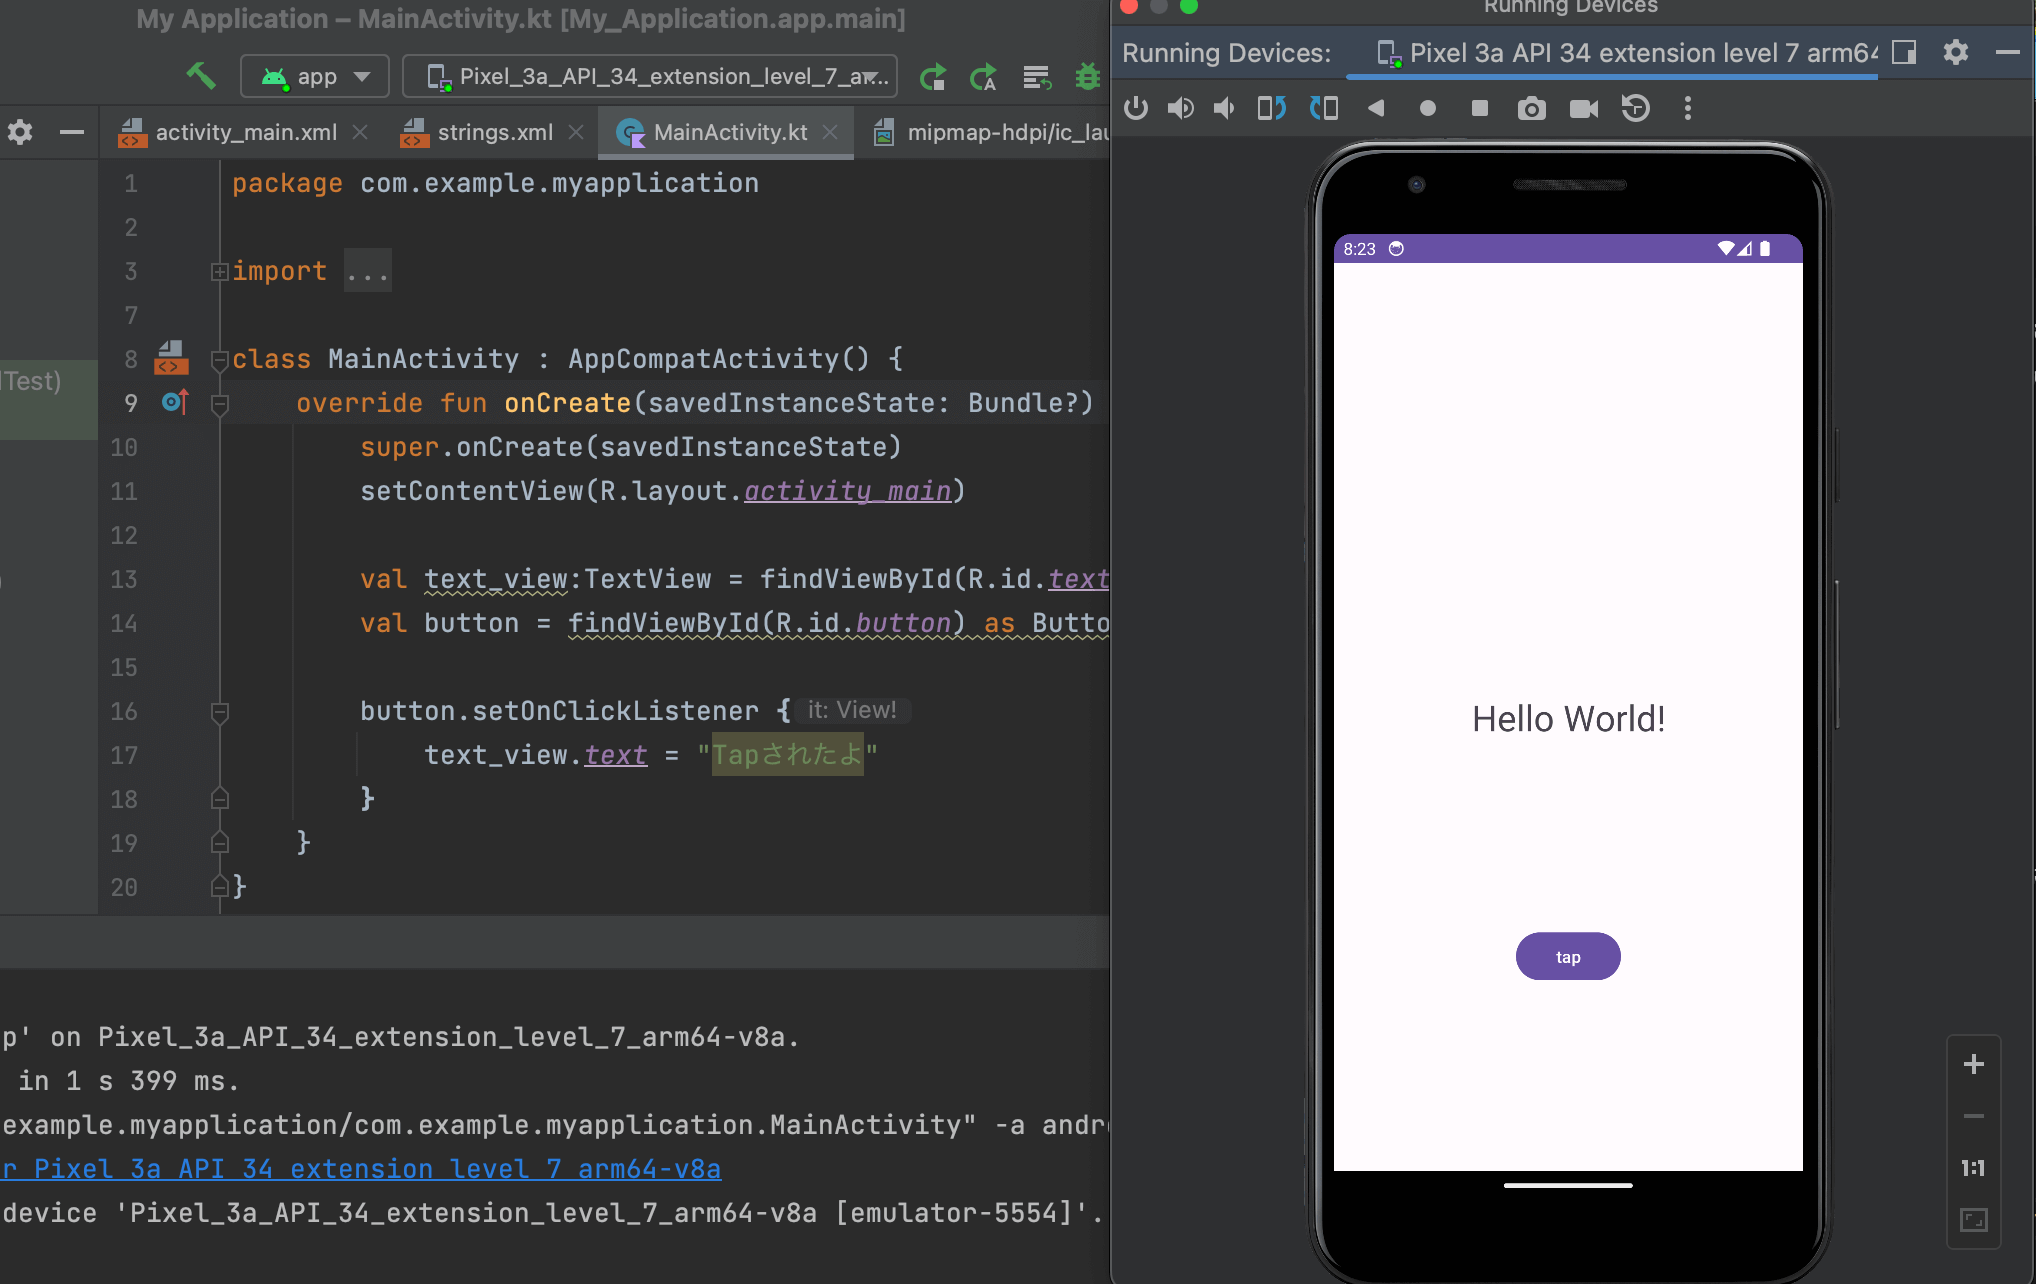
ボタンのアクション部分はsetOnClickListenerメソッドの中に定義していきます。以下はTextViewの文字列をタップとともに書き換えています。
val button:Button = findViewById(R.id.button)
// ↓追加
button.setOnClickListener {
    text_view.text = "Tapされたよ"
}
エミュレータを起動する
ここまでできたらエミュレータを起動して動作を確認してみます。上部の「 」をクリックするとエミュレータが起動します。Android Studioの右側に表示されるのでドラッグ&ドロップすると外側に出すことが可能です。タップして文字列が変化するか試してみてください。
まだまだ勉強中ですので間違っている点や至らぬ点がありましたら教えていただけると助かります。
ご覧いただきありがとうございました。