【SwiftUI】地図(Maps)を表示するMapKitの使い方!Map()とは?

この記事からわかること
- Swift UIで地図(Maps)を表示する方法
- MapKitフレームワークの使い方
- アノテーションの設置方法とカスタマイズ
- MKCoordinateRegionやCLLocationCoordinate2Dとは?
- iOS14以降から使用可能なMap()(MapView)の使い方とイニシャライザ
index
[open]
\ アプリをリリースしました /


Swift UIで地図を表示させる方法をまとめて行きます。
地図を表示できるMapKitフレームワーク
Swift UIで地図を表示したい場合はMapKitフレームワークを導入することで簡単に実装することができます。
MapKitフレームワークはApple純正の地図アプリである「Maps(マップ)」で表示しているような地図情報を実装するためのフレームワークです。SwiftUIのみで使えるわけではなく UIKitでも使用できます。
Xcodeには既に組み込まれているので「import MapKit」と記述するだけで使用可能になり、地図に対してのさまざまな操作が可能になります。
出来ること
- 地図の表示
- アノテーションの設置やカスタマイズ
- 現在地の表示
- 経路を表示する
- ジオコーディング(住所→座標)
- 逆ジオコーディング(座標→住所)
MKCoordinateRegion
ビューに地図を実際に表示させるには表示させる場所を定義するところから始めます。定義するにはMKCoordinateRegion構造体を用います。MKCoordinateRegionは指定した緯度と経度から座標領域を定義することができます。
MKCoordinateRegion(
    center centerCoordinate: CLLocationCoordinate2D,
    latitudinalMeters: CLLocationDistance,
    longitudinalMeters: CLLocationDistance
)
center centerCoordinate: CLLocationCoordinate2D
centerには表示させたいエリアの中心座標を緯度と経度で指定します。ここで指定した座標の領域が地図の中心点として表示されます。
指定するCLLocationCoordinate2Dはプロパティに緯度(= latitude)と経度(= longitude) をもつ構造体です。
struct CLLocationCoordinate2D {
	CLLocationDegrees latitude;
	CLLocationDegrees longitude;
};各プロパティに設定する値であるCLLocationDegrees型はDouble型のタイプエイリアスです。
typealias CLLocationDegrees = Double latitudinalMeters: CLLocationDistance
latitudinalMetersは緯度(= latitude)に対しての表示エリアをメートル(= Meter)で設定できます。緯度は横側(東西)の表示部分です。
指定する値であるCLLocationDistanceは先程同様にDouble型のタイプエイリアスなので、Double型で指定します。1000メートルの場合は1000.0でOKです。
typealias CLLocationDistance = DoublelongitudinalMeters: CLLocationDistance
longitudinalMetersは経度(= longitude)に対しての表示エリアをメートル(= Meter)で設定できます。経度は縦側(南北)の表示部分です。
こちらも同様にDouble型で指定します。
MapViewを使って地図を表示する
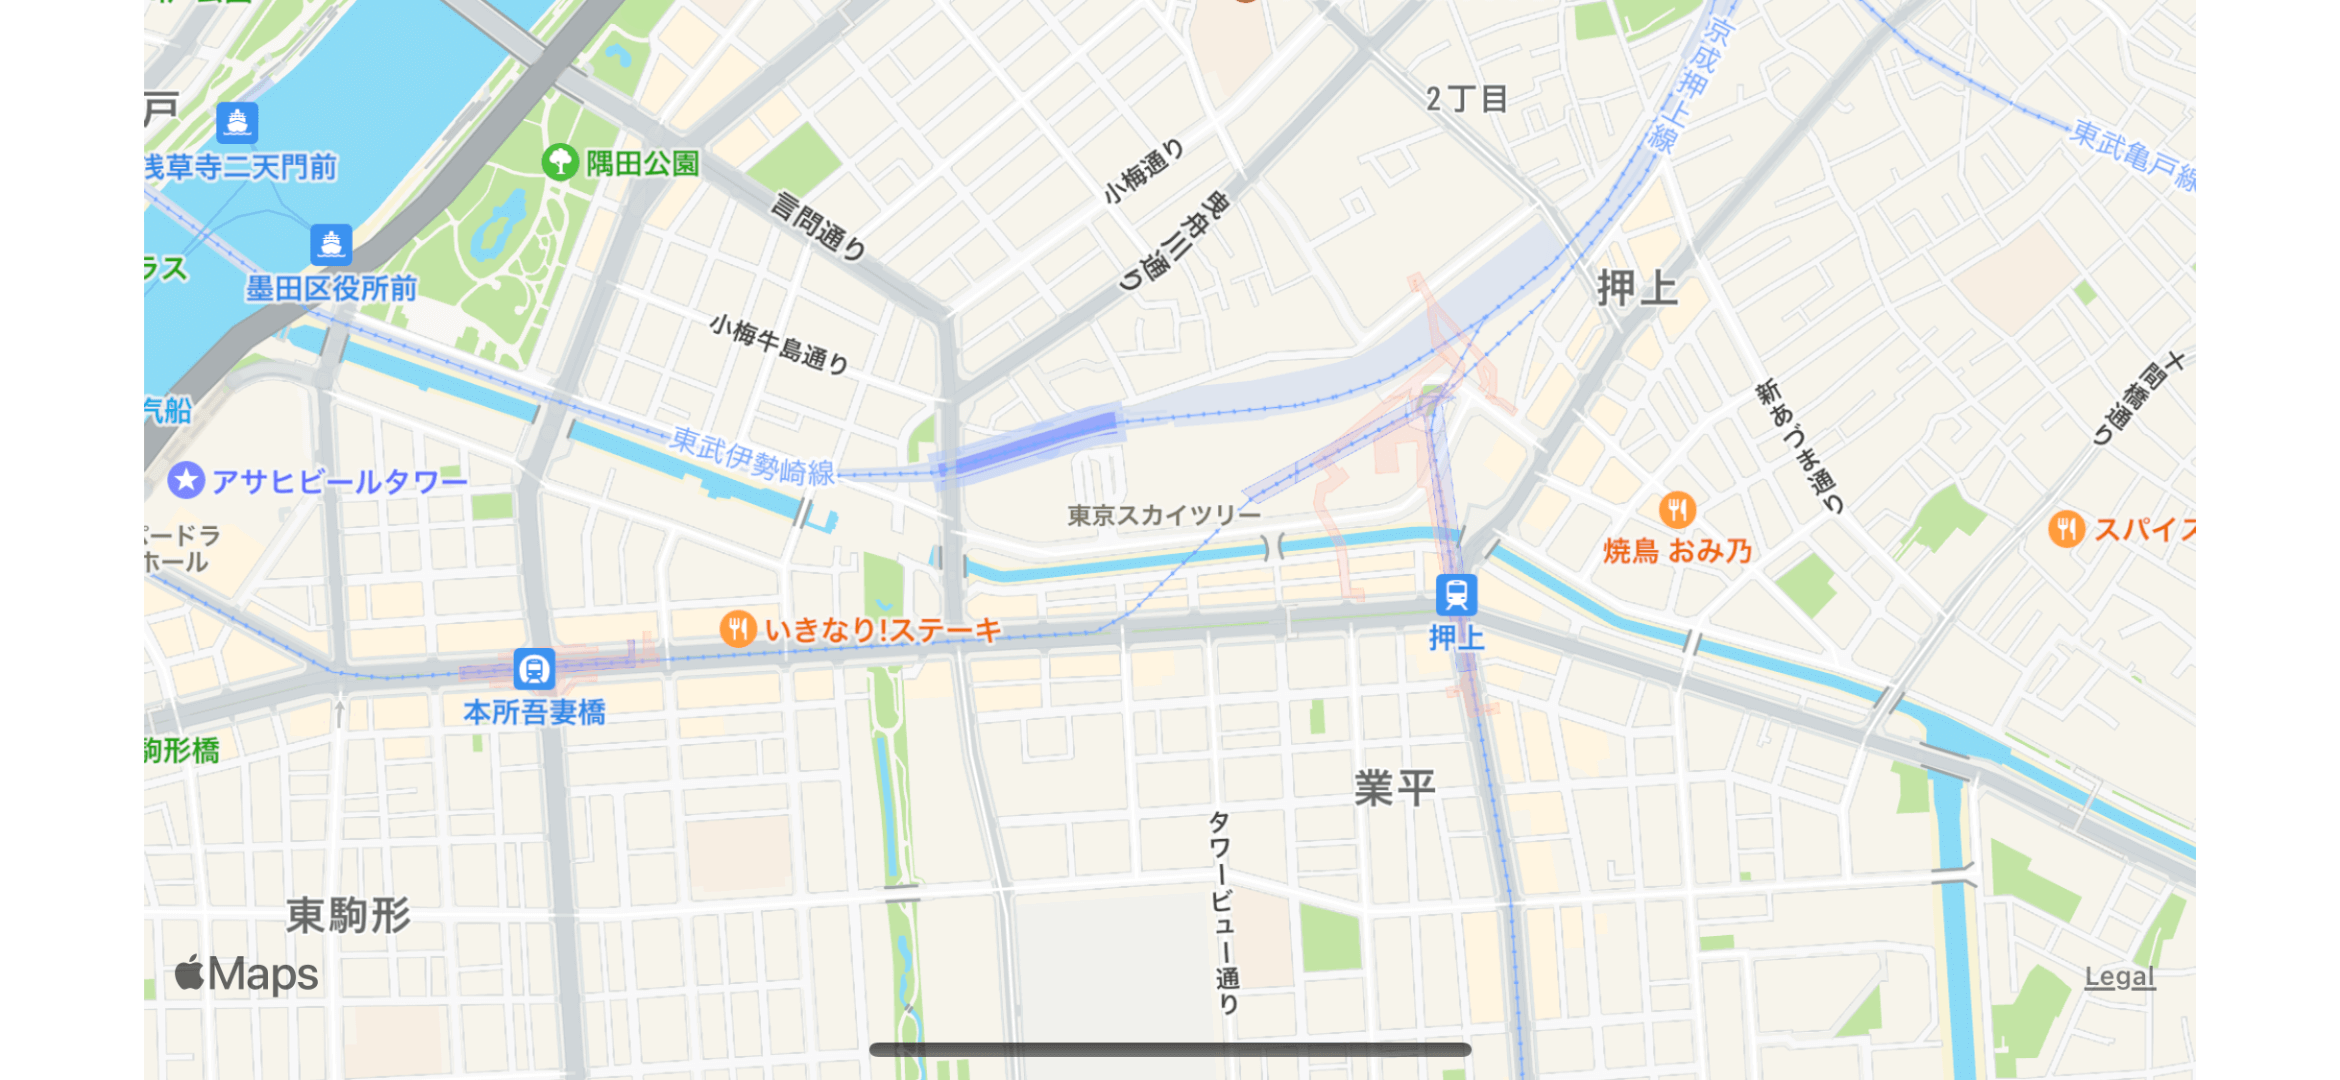
今回は「東京スカイツリー」の場所を定義してみます。まずはMKCoordinateRegion構造体を変数に格納しておきます。
@State  var region = MKCoordinateRegion(
    center : CLLocationCoordinate2D(
          latitude: 35.710057714926265,  // 緯度
          longitude: 139.81071829999996 // 経度
        ),
    ),
    latitudinalMeters: 1000.0, // 南北
    longitudinalMeters: 1000.0 // 東西
)座標の定義が完了したら、実際に地図を表示させていきます。表示させるにはMap()を使います。これはMapKitのメソッドではなくiOS14以降からあらかじめ定義され使用可能になったView構造体の1つです。それ以前はUIViewRepresentableプロトコルに準拠させた View構造体を自前で用意しなくてはいけませんでした。
Mapの定義
@available(iOS 14.0, tvOS 14.0, macOS 11.0, watchOS 7.0, *)
public struct Map<Content> : View where Content : View {
イニシャライザ
Map(coordinateRegion: Binding<MKCoordinateRegion>)実際のコード
Map(coordinateRegion: $region)上記のイニシャライザが一番シンプルな形式です。引数には先程座標を定義した構造体を指定します。
これだけでアプリ画面に地図を表示することが可能になっています。
struct ContentView: View {

    @State  var region = MKCoordinateRegion(
        center : CLLocationCoordinate2D(
            latitude: 35.710057714926265,  // 緯度
            longitude: 139.81071829999996 // 経度
        ),
        latitudinalMeters: 1000.0, // 南北
        longitudinalMeters: 1000.0 // 東西
    )

    var body: some View {
        // 地図を表示
        Map(coordinateRegion: $region)
            .edgesIgnoringSafeArea(.bottom)
    }
}
MapView構造体の引数の種類
MapView構造体には様々な引数を渡すことができます。
 Map(coordinateRegion: Binding<MKCoordinateRegion>,
    interactionModes: MapInteractionModes = .all,
    showsUserLocation: Bool = false,
    userTrackingMode: Binding<MapUserTrackingMode>? = nil,
    annotationItems: [
      Point(coordinate: .init(latitude: latitude, longitude: longitude))
    ],
    annotationContent: { item in
        MapMarker(coordinate: item.coordinate)
})
coordinateRegion
MKCoordinateRegion構造体の変数をバインディングする。@Stateで更新を見張る必要あり
interactionModes
ユーザーが操作できる機能を指定値から設定
.pan  : スワイプ(ドラッグ)操作を許可
.zoom : 拡大・縮小の操作(ダブルタッチ or ピンチ操作)を許可
.all  : 上記2つを許可
showsUserLocation
ユーザーの現在位置表示の有無をBool値で設定
userTrackingMode
ユーザーの現在位置が移動した場合にMapが追跡するかどうかを設定
.follow : ユーザーを追跡
.none   : 追跡しない
annotationItems
アノテーションを付与するための構造体を配列に入れて指定する(後述しています)
annotationContent
アノテーションのデザインを設定する(後述しています)
アノテーションを付与する
アノテーション(Annotation)とは「注釈」の意味を持つ英単語で、MacKitでは地図上で場所指し示すピン(情報タグ)のことを指します。
MapKitではアノテーションのデザインとして「マーカー(MapMarker)」と「ピン(MapPin)」の2つか用意されています。さらに独自にカスタマイズしたアノテーションを使用することも可能です。
アノテーションを表示させるにはピンを指すポイントを指定しなければいけません。スポットの指定はIdentifiableプロトコルに準拠した構造体で定義します。
プロパティには「緯度=latitude」と「経度=longitude」、MKCoordinateRegionの引数centerでも使用した「CLLocationCoordinate2D型の座標(=coordinate)」を持たせます。名前は任意のものでOKですが今回はPointとしておきます。
struct Point: Identifiable {
    let id = UUID()
    let latitude: Double // 緯度
    let longitude: Double // 経度
    // 座標
    var coordinate: CLLocationCoordinate2D {
        CLLocationCoordinate2D(latitude: latitude, longitude: longitude)
    }
}
この構造体に値を渡したものを、下記のように配列にして変数に格納します。
var pointList = [
    Point(latitude: 35.709152712026265, longitude: 139.80771829999996),
    Point(latitude: 35.711554715026265, longitude: 139.81371829999996),
    Point(latitude: 35.712527719026265, longitude: 139.81071829999996)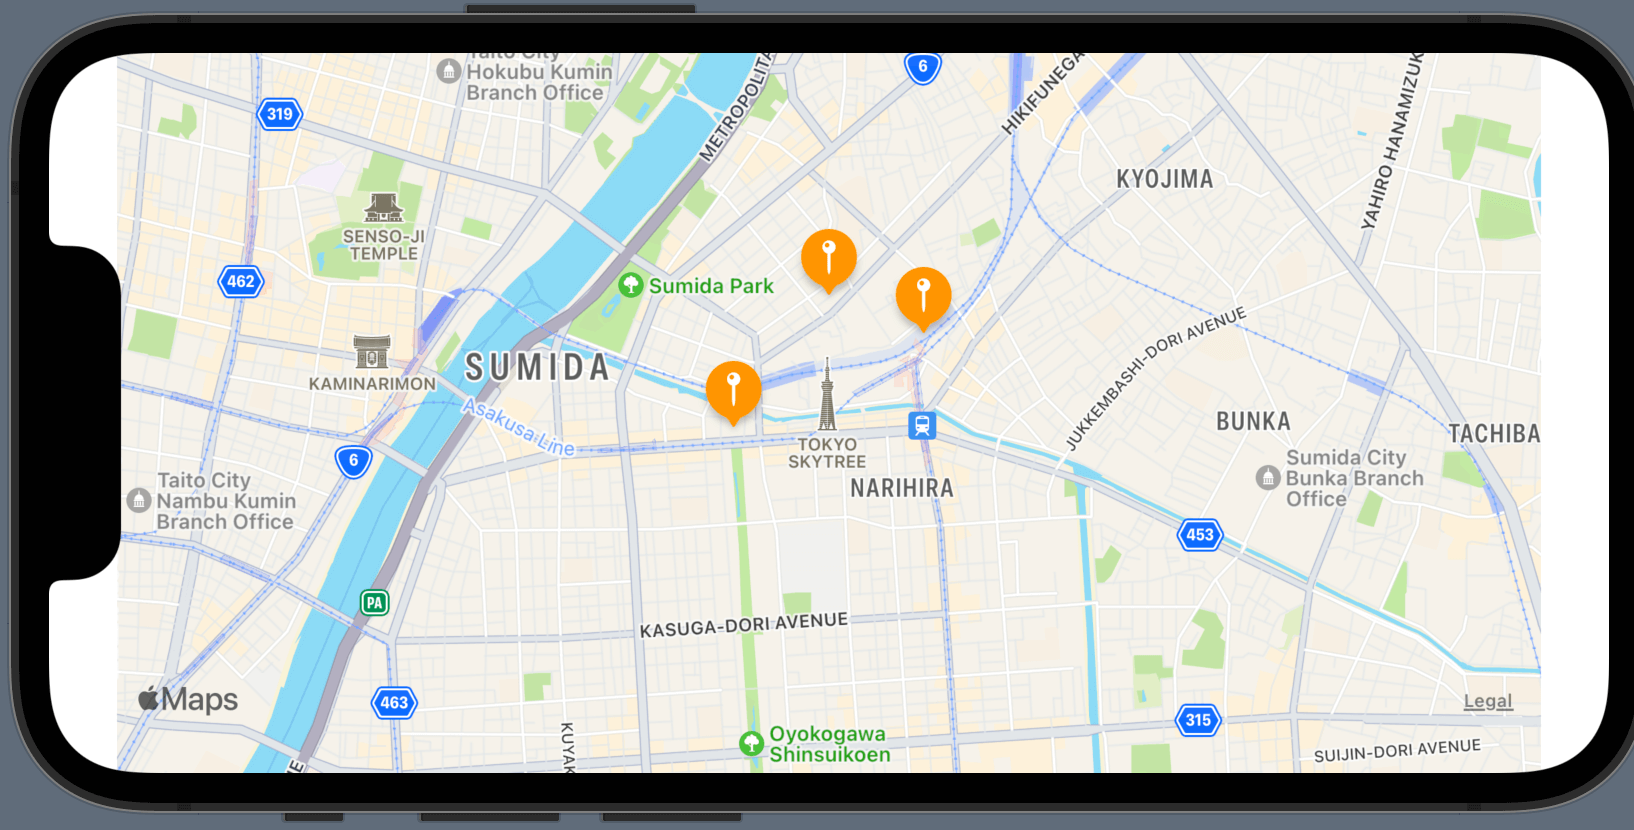
]あとは準備した表示する領域を示すregionとアノテーションポイントを示すpointListをMapViewの引数に渡します。
var body: some View {
  Map(coordinateRegion: $region,
      annotationItems: pointList,
      annotationContent: { point in MapMarker(coordinate: point.coordinate, tint: .orange)}
  ).edgesIgnoringSafeArea(.bottom)
}annotationContentにはアノテーションのデザインの異なる「マーカー(MapMarker)」と「ピン(MapPin)」のどちらかを指定します。coordinateにはポイントの座標であるpoint.coordinateを、tintにはカラーを指定します。配列の中にあるのでpoint in MapMarkerで1つずつ取り出してコードをあてがっています。
MapMarker/MapPinの定義
public struct MapMarker : MapAnnotationProtocol {

    public init(coordinate: CLLocationCoordinate2D, tint: Color? = nil)
}

public struct MapPin : MapAnnotationProtocol {

    public init(coordinate: CLLocationCoordinate2D, tint: Color? = nil)
}
全体のコード
struct ContentView: View {

    var pointList = [
        Point(latitude: 35.709152712026265, longitude: 139.80771829999996),
        Point(latitude: 35.711554715026265, longitude: 139.81371829999996),
        Point(latitude: 35.712527719026265, longitude: 139.81071829999996)
    ]

    @State  var region = MKCoordinateRegion(center: CLLocationCoordinate2D(
            latitude: 35.710057714926265,
            longitude: 139.81071829999996
        ),
        latitudinalMeters: 1000.0,
        longitudinalMeters: 1000.0
    )
    var body: some View {

        Map(coordinateRegion: $region,
            annotationItems: pointList,
            annotationContent: { point in MapMarker(coordinate: point.coordinate, tint: .orange)})
            .edgesIgnoringSafeArea(.bottom)
    }

}
カスタマイズしたアノテーションを作成する
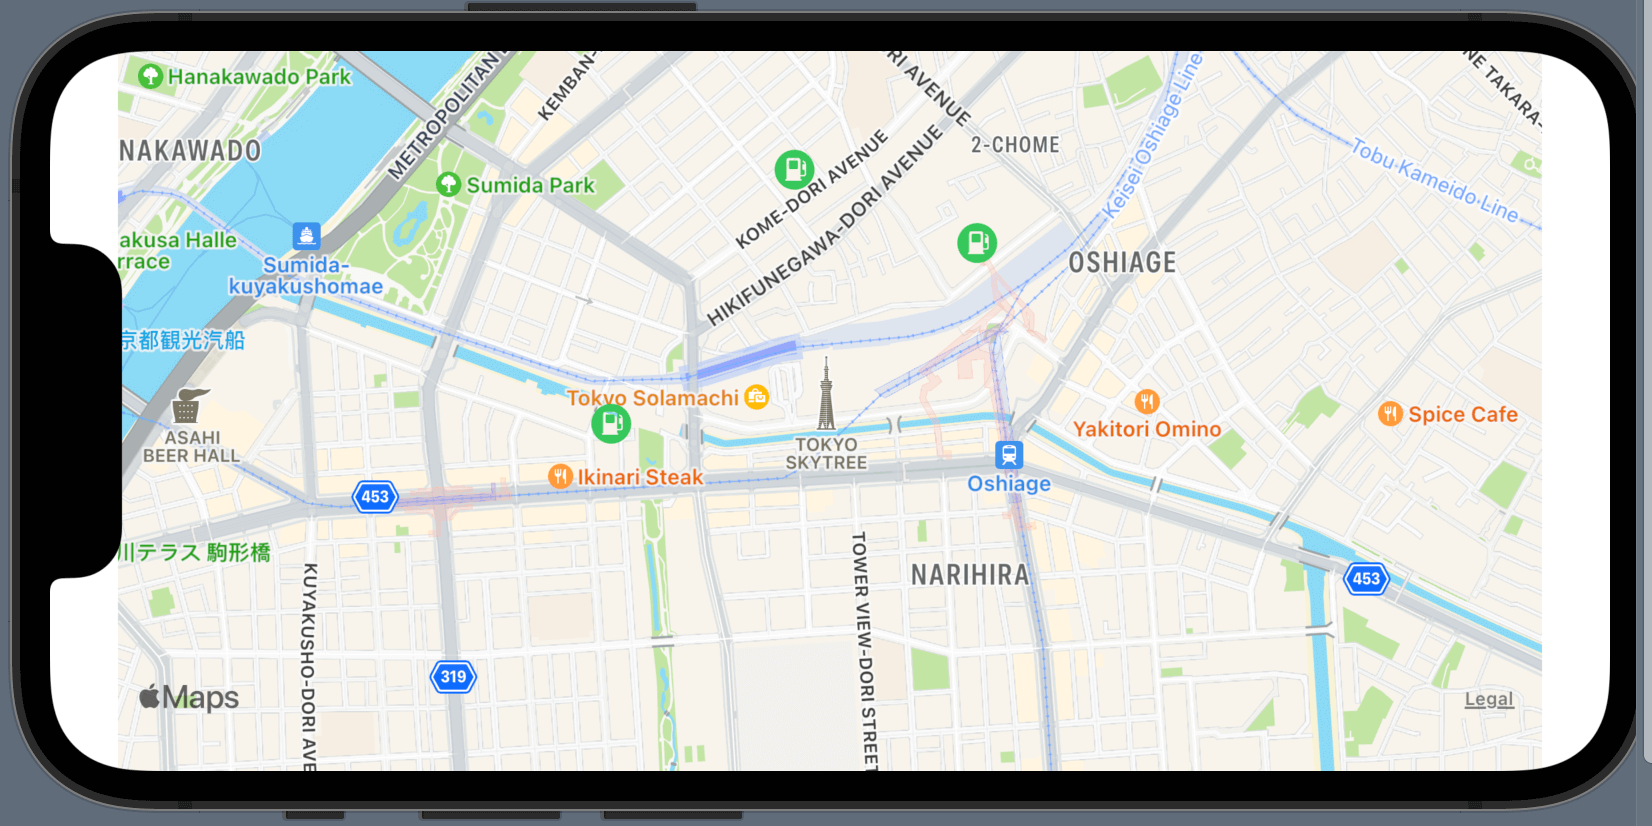
アノテーションは既存のものではなくMapAnnotationを使用することで自分で自由にカスタマイズすることも可能です。
Map(coordinateRegion: $region,
    annotationItems: pointList,
    annotationContent: { point in MapAnnotation(coordinate: point.coordinate,
    anchorPoint: CGPoint(x: 1, y: 1), // ポイントからのアノテーションの表示位置を調整
    content: {
        // ここに表示したいデザインを構築
        Image(systemName: "fuelpump.circle.fill").foregroundColor(.green).font(.system(size: 20))
    })}
).edgesIgnoringSafeArea(.bottom)anchorPointにはポイントから実際にアノテーションを表示する位置を調整できます。content部分にカスタマイズして作成するアノーテーションのデザインを記述します。ImageやTextなど自由に作成することができるようになります。
実際に使用して作成した自作アプリ
私がSwiftUIフレームワークとMapKitフレームワークを用いて実際に作成した地図メモアプリがこちらになります。ソースコードもGitHub上に公開していますので興味があればご覧ください。
アプリ概要
- お気に入りのスポットを地図上にマーク
- 駐車場やガソリンスタンドなどをマークしメモを残せる

まだまだ勉強中ですので間違っている点や至らぬ点がありましたら教えていただけると助かります。
ご覧いただきありがとうございました。
私がSwift UI学習に使用した参考書